Ford Mustang V6 and Mustang GT 2005-2014: How to Install Halo Headlights
Add some flair to your front lighting!
This article applies to the Ford Mustang V6 and GT (2005-2014).
Headlights to your vehicle are crucial to the safety of you and your passengers in both day time and night time driving. In some weather conditions, fog lights are useful to clear the road ahead of you for clearer vision. Most fog lights are "off" during the day time. There is an aftermarket solution, however, that allows the owner to install an "accessory" light that illuminates the "opening" of the fog lights lens, creating a "Halo" effect. These are often referred to as Halo fog lights. There are also aftermarket "Halo headlights" available that give the same effect. They can be operated through the "parking lights" and still illuminate during the day.

Note that if replacing the fog lights only, it will cost $129. If replacing the headlights only, it will be between $175 to $220.
Materials Needed
- Wire cutters
- Solder and soldering iron
- Electrical tape
- Heat shrink
- X-acto knife
- Screwdriver(s)
- Torx bit drivers
- Ratchet wrench with various sockets
Step 1 – Remove front bumper
If you are simply replacing the fog lights, only the front grill needs to come out. But, if you're replacing the headlights and fog lights, it is easier to access everything with the bumper completely off.
- Remove the six radiator cover bolts.
- Remove the upper bumper bolts. (One on each side.)
- Remove the fender liner screws.
- Remove the four bumper bolts. (Two on each side.)
- Pull bumper down and towards you to release from guide clip.

Figure 1. Upper bumper mounting bolts. 
Figure 2. Inner bumper mounting bolts.
Pro Tip
To access the side bumper bolts, you'll need to pull the fender liner back a bit to see them.
Step 2 – Wire up new lighting
Now that the front bumper and grille are off, the headlights and fog lights can be mounted and wired up.
- Remove four Torx screws from existing fog lights and remove housings as a unit.
- Install new Halo fog lights into mounting recess and secure with Torx screws.
- Splice new fog light wiring into existing wiring harness.
- Solder new splices and secure with heat shrink.
- Secure new connections with electrical tape.
- Mount headlights into their recesses and complete wiring harness similar to how you spliced the fogs.

Figure 3. Backside of light housing. 
Figure 4. Light with wiring harness. 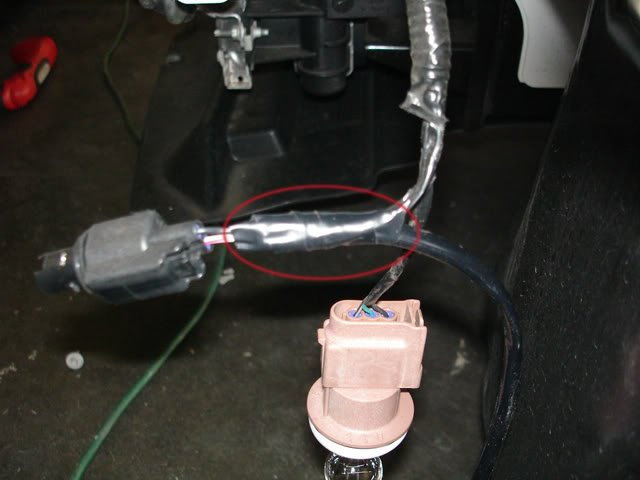
Figure 5. Splice into harness.
Pro Tip
The inverters, which cost $4.50 each, can be mounted to the frame rails with supplied 3M backing stickers. The splice can be performed at the black parking lights wire. This way, the Halos will turn on during the day time when "park" lights are activated.
Step 3 – Test lighting
Now that the wiring is all connected for fog lights and headlights, it is time to test.
- Turn on park lights and observe the four Halos.
- If any of the Halos are not illuminating, double check the wiring.
- If lights illuminate as desired, reinstall front grille and bumper.
- Secure bolts to upper portion of bumper as well as sides.
- Reinstall fender liner screws.

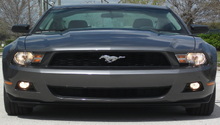
Figure 6. Example of finished product. 
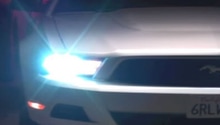
Figure 7. Another finished example. 
Figure 8. On the headlight housing.
Related Discussions
- DIY: Bumper Removal and Halo Fog Light Install - MustangForums.com
- Discussion Regarding CCFL Inverters - MustangForums.com
- Help with Oracle Halos - MustangForums.com