Ford Mustang GT 2005-2014: How to Install Short Throw Shifter
The factory shifter has been known to not satisfy Mustang owners, especially during performance driving. A quality aftermarket short throw shifter uses steel and aluminum components along with urethane bushings to provide smooth and consistent performance.
This article applies to the Ford Mustang GT (2005-2014).
A short throw shifter reduces the driver's effort during gear changes using the concept of mechanical advantage. By engineering the shifter assembly with improved angles, gear shift lengths are shortened from 25% to 50% on average. A quality aftermarket short throw shifter reduces the notchiness and free play associated with factory shifters. Owners looking to improve there track times by reducing shift duration and increasing consistency will greatly benefit from this modification.

Materials Needed
- Floor jack
- Jack stands (x2)
- 3/8" ratchet
- T30 Torx
- 10mm shallow socket (2011-2014 only)
- 10mm deep socket
- 12" extension
- 6" extension
- 1/2" ratcheting wrench
- Safety glasses
- 13mm deep socket (2005-2010 only)
- 13mm shallow socket (2005-2010 only)
- 10mm ratchet wrench (2005-2010 only)
- 1/4" Allen key (2005-2010 only)
The procedure for the 2005 to 2010 Mustang differs from the 2011 to 2014 Mustang. Both will be covered in this article and the differences will be labeled when applicable.
Step 1 – Remove the shift knob
Turn the shift knob counterclockwise. Don't worry about damaging the boot, as it's not connected to the shift knob.
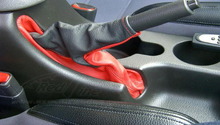
Step 2 – Remove the shifter boot
On the 2005 to 2010 Mustang, the boot clips onto the center console. Grab both sides of the boot at the center and lift up to remove it.
On the 2011 to 2014 Mustang, you will need to remove a trim piece on top of the center console. Begin by opening the rear console door and lift up the folding compartment door at the center of the console. Grab both sides of the trim panel at the center and lift up to unsnap it. Lift it only high enough to disconnect the electrical connector at the left side of the shifter attached to the hazard and trunk release switches.

Figure 1. Pull up on console trim in locations indicated by arrows. 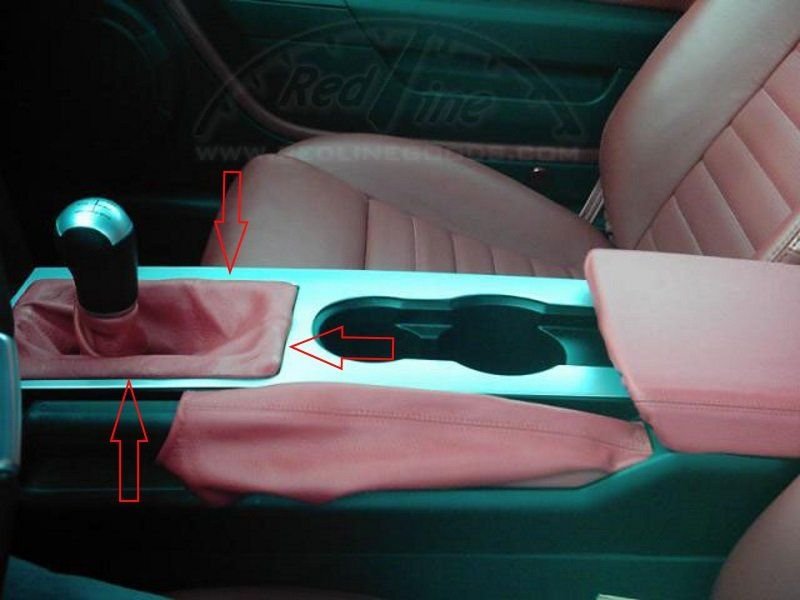
Figure 2. Pry up on edge of boot at locations indicated by the arrows.
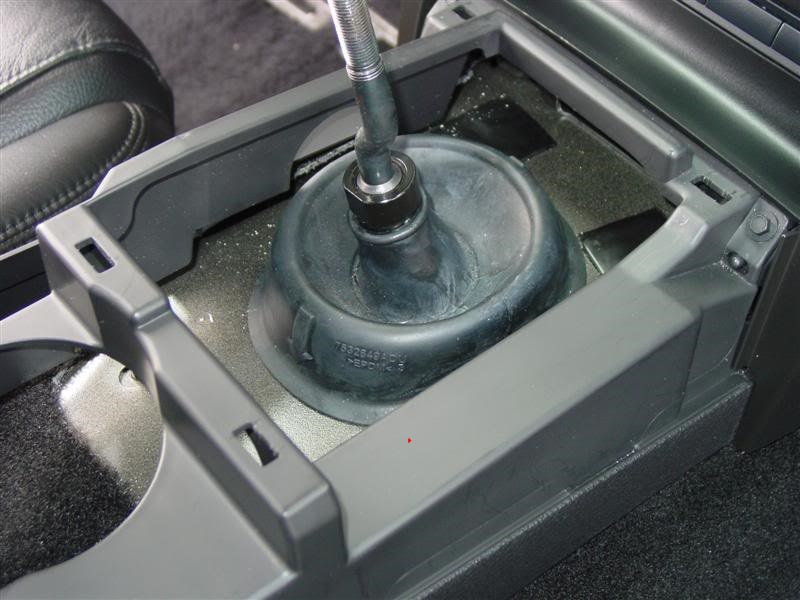
Step 3 – Remove the rubber floorboard boot
You will see this black boot surrounding the base of the shifter. Pull the outer edge of the boot towards the shifter. You will see it separate from the metal underbody.
On the 2011 to 2014, you'll first need to remove the cloth insulation above the rubber boot. Lift up on the front of the cloth and remove the screw holding the back portion.
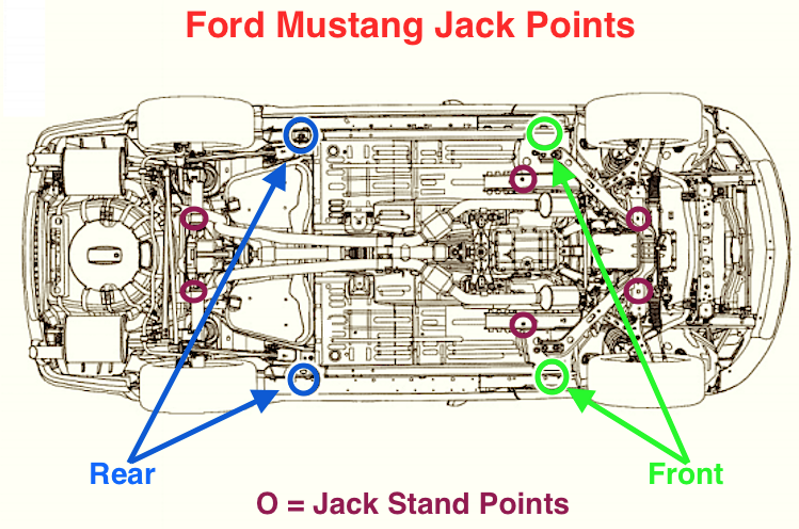
Step 4 – Raise the front of the vehicle
You may need to raise the rear also, depending on your size and the amount of space you prefer. Engage the emergency brake. Position the floor jack below one of the jacking points on the front of the vehicle. Once your desired height is achieved, place a jack stand as close to the jacking point as possible. Repeat this procedure for the other corners. Blocks of wood can be placed between the jack stands and body to reduce the chance of damage.
Step 5 – Remove the shift bracket assembly
The 2005 to 2010 Mustang uses a support arm, shifter arm, and a rear shifter support for attachment to the body and chassis.
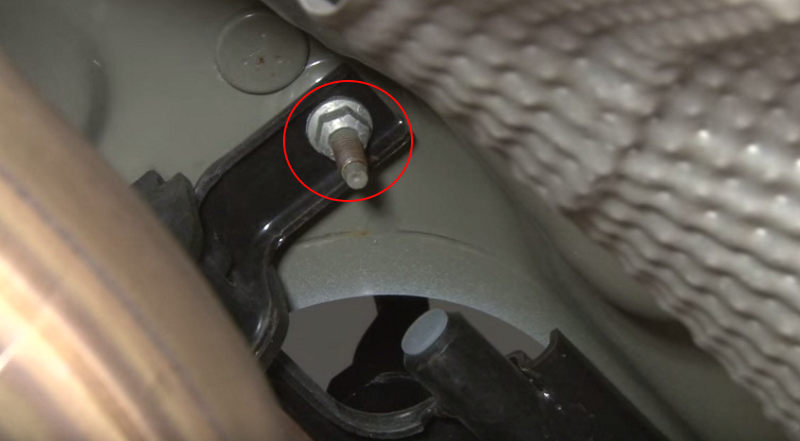
Begin by removing the shifter support arm. You will see the nut holding it to the transmission in front of the driveshaft on the right side.

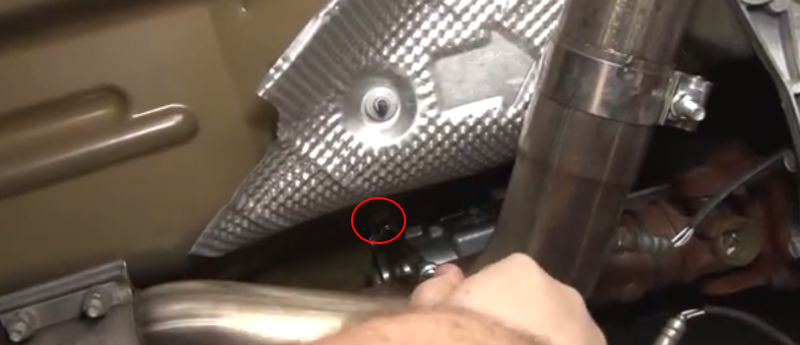
Now remove the two nuts holding the rear shifter support to the body with a 10mm socket. You will see these above the exhaust X-pipe. Remove the nut for the shifter arm. This nut will require a 13mm socket. You're now ready to remove the shifter assembly by lifting it out from inside the cabin. Position the shifter arms in a location where they wont become jammed as you raise the assembly. You may need to wiggle/twist the assembly to complete the removal.
On the 2011 to 2014 Mustang, start the removal by removing the shifter bracket at the rear of the transmission. There are two nuts on each side of the bracket. You will need a long extension to reach these. Pull the bracket down, then slide it backwards once the nuts are removed. Move back to the interior and remove the four bolts surrounding the shifter. The front bolts may require a Torx bit/socket. Lift the shifter straight up and slightly tilt it to finish the removal.
Step 6 – Install the short throw shifter
Refer to the shifter's manufacturer's instructions for details during installation. You may be required to transfer a stock component onto the new shifter. Drop the shifter into the opening, carefully lining up the front and rear section of the assembly to the spaces on the transmission/body. This includes sliding the cup around the transmission lockout on the 2011 to 2014 Mustang. Install the four bolts on the upper section of the shifter. Hand-tighten all four, and then snug them up with your ratchet. Move to the bottom of the vehicle and re-install the upper shifter bracket. Slide the shifter assembly into place and connect the lower bracket to the upper bracket.
On the 2005 to 2010 Mustang, re-connect the front support arm, rear shifter support bracket (this may be included with your new shifter), and the shifter arm. Hand-tighten all the nuts/bolts initially, making sure the shifter's position is correct. Snug up the shifter assembly bolts and reverse (Steps 4 through 1) to complete the installation.

Featured Videos: Mustang Short Throw Shifter Installation
-
Barton Industries Short Shifter Installation
-
Ford Racing Short Throw Shifter Installation
Related and Discussions
- Best Short Throw Shifter - MustangForums.com
- Short Throw Shifter Installed on T-45 - MustangForums.com
- Thoughts on Saleen Short Shifter - MustangForums.com
- Saleen Short Throw Shifter Installed - MustangForums.com