Ford Mustang V6 and Mustang GT 1994-2014: Why Isn't My Horn Working?
This article has information regarding fixing the horn in your Ford Mustang. It's a pretty simple procedure to get it working again, but we'll go through some of them to ensure yours is working properly every time you press it.
This article applies to the Ford Mustang V6 and Mustang GT (1994-2014).
Although it can be used to attract the attention of a friend on the sidewalk, the main purpose of your car's horn is to get attention and alert someone to your presence to avoid an accident. In this regard, the horn is a very important safety feature in your car that should not be neglected or forgotten about. If it stops working, there is likely a reason you can address yourself. Keep reading for some diagnostic procedures.

Materials Needed
- Flashlight
- Multi-meter or a voltage tester
- Various screwdrivers
Step 1 – The first thing to check will be the fuse
The fuse may be blown, so that's the easiest and most logical place to start your troubleshooting.
Since the horn is normally mounted up front on the car, near the radiator, it's subjected to all the rocks on the highway, the rain and other elements. Over time, there may be a compromised contact that could short out and blow the fuse, since that's its sole purpose.
- It's generally a good idea to disconnect the battery when touching fuses, although remember to reconnect it when testing for continuity.
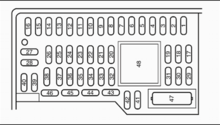
- Use your flashlight to look under the driver kick panel to check if the horn fuse is blown.
Pro Tip
It's generally good practice to keep some new fuses on hand. At your local auto parts store, they sell packages with various different amperage. Keep a few in your center console for issues like this.
It's time to see if that fixed the problem. If it wasn't a blown fuse, then we'll check a few other things. That might be good news though, as a blown fuse generally doesn't occur for no reason.
Step 2 – Check continuity at the horn itself and the horn button on the steering wheel
The problem here could be the wiring, or the horn. Most of the time, it's either the switch (what you press on the steering wheel) or the horn itself. Look for broken contacts at both of those locations as that would be a very easy fix.
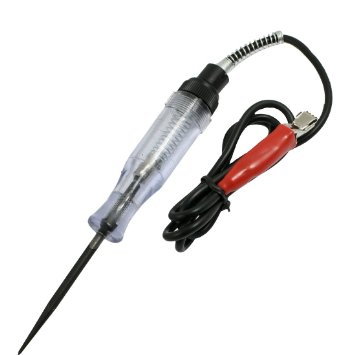
Get out your voltage tester, let's see if we have power.
- Please reconnect the battery under the hood.
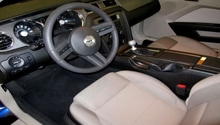
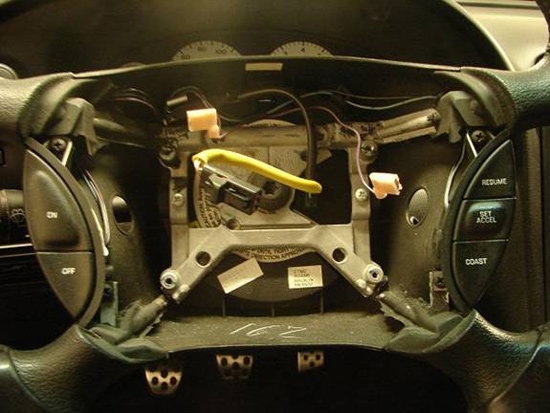
- Now, pop off the horn cover to expose the wiring beneath it.
Connect your voltage tester to a ground source. Anywhere with bare metal that is not buffered from the bare metal on the chassis of the car would be adequate. You can also clip onto the negative terminal on the horn since the way it sends the signal to blow the horn is by closing the circuit.
Below you can see the two female butt connectors where the horn would make contact. Connect your voltage tester across both and ensure it lights up when you do. If so, then you DO have power at the switch. Clean off the connection points, make sure there's no corrosion or breaks in the contacts and put that part back together.
Here is a picture of what a simple voltage tester looks like. They are cheap at your local parts store.
Warning
Be very careful when removing and reinstalling the horn assembly as it's likely connected to the airbag, which is a very sensitive and expensive part to replace. You also do not want the airbag deploying while you're handling it, so take caution.
Now we'll double check power on the other end of the line, the horn!
Step 3 – Check continuity at the horn
What we're checking here is that the horn itself is receiving the voltage, too.
- Pop the hood and, in front of the radiator, look for the horn itself.
- Unplug the horn wiring harness and follow the same instructions as you did with the wheel button.
Now let's piece all that information together. Next step will be figuring out how to interpret what you've found.
Pro Tip
Take your time, and use your brain more than your muscles. It's easy to miss a step or not realize something, so if you are frustrated, take a step back and come back to the project later with a fresh perspective.
Step 4 – Finalize and replace things
Listed below are the potential things that could be the outcome based on your findings.
- We'll start with the assumption that the fuse is intact. If it is blown, replace it. If it pops again, you must check all the things mentioned in this article and look for a break in the wiring insulation or somewhere where it's making contact and shorting and blowing the fuse.
- If there is power to the steering wheel button and the horn, try touching the two contacts at the steering wheel together. If the horn sounds, then replace the switch at the steering wheel. If it does not, then your horn itself needs to be replaced.
- It seems complicated but that's the sum of repairing it. Start at the power source, then work your way back to the trigger for the source, then finally end at the actual device you're troubleshooting. The process is really to help you avoid buying all new parts and narrowing it down to which is actually the culprit. On older vehicles it could be as simple as a corroded connection, or disconnected/broken wire.
Related Site
- Fuse Information - Veryuseful.com