Ford Mustang GT 1996-2004: Air Conditioning Diagnostics
It's summer time and the A/C just quit in your Ford Mustang - not good. It's a closed system and you just need to know where to look.
This article applies to the Ford Mustang GT (1996-2004).
The A/C system in your Ford Mustang has several components that could potentially fail over the life of the vehicle. When the A/C stops blowing cold, it's time to start looking at all the components one by one. Luckily, this closed system can leave plenty of clues. When troubleshooting this or any system, it always make sense to start with the simple things. It could be just the quick fix you were looking for without having to disassemble a thing.

Materials Needed
- Ratchet with extension
- Socket set
- Multimeter
- Fuse puller/pliers
- A/C recharge kit
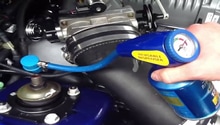
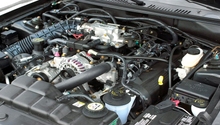
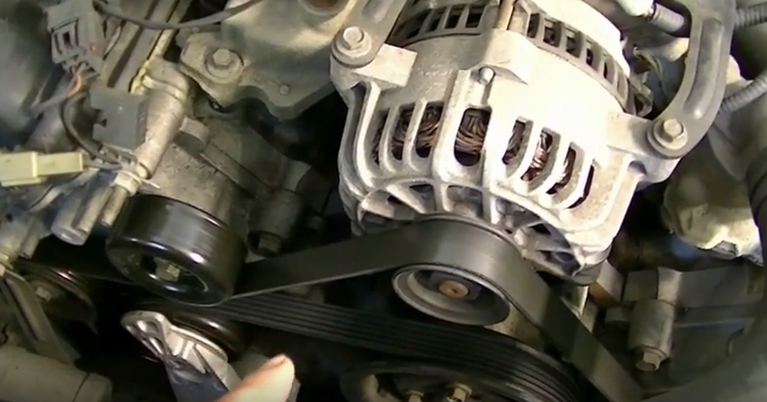
Step 1 – Take a look at the compressor
At the heart of your air conditioning system is the compressor (see Figure 1). The compressor clutch controls the activation of the compressor by allowing the pulley to spin when the clutch is engaged. When you turn the A/C on, you should be able to see the clutch engage, allowing the belt to turn the compressor.
If that does not happen, you could have a few issues. It could be an electrical issue, such as a blown fuse, bad relay, the clutch may be damaged, or the coolant may be too low. Time to dig a little deeper.
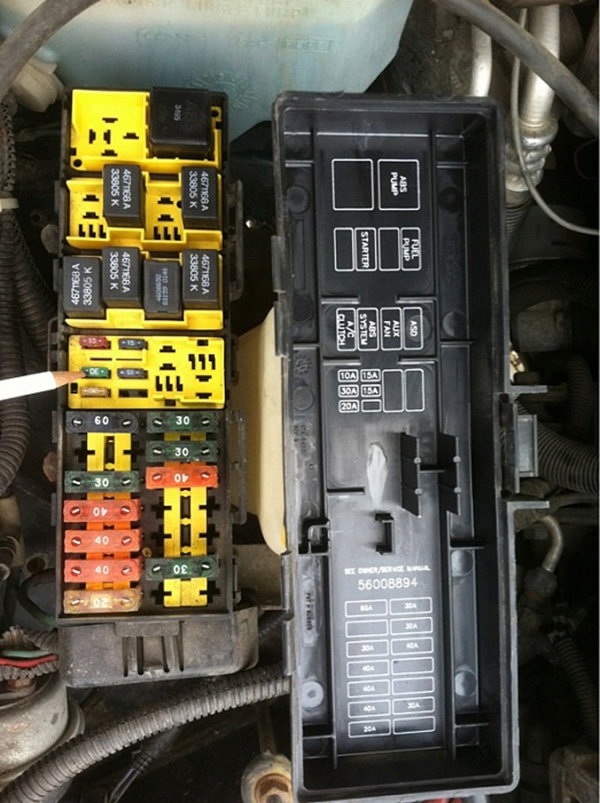
Step 2 – Check your fuses and relays
Starting simple is the key. Pop open the nearest fuse box to locate your compressor's fuse and relay. The fuse can be checked with a simple visual inspection, but the relay is not as easy to assess. If you have another similar relay handy, by all means just swap it out. You can also use a simple jumper wire to bypass the relay switching mechanism just to quickly check if it functions properly. Then you know you have a bad relay.
Step 3 – Check the voltage at the clutch
Use a multimeter to check the voltage reading at the clutch. If there is a voltage but it does not engage, then it will need to be replaced. If the clutch does engage but fails to turn the compressor, then your compressor is seized and will need to be replaced. There is no mistaking this condition because the belt should be making some serious noises at this point!
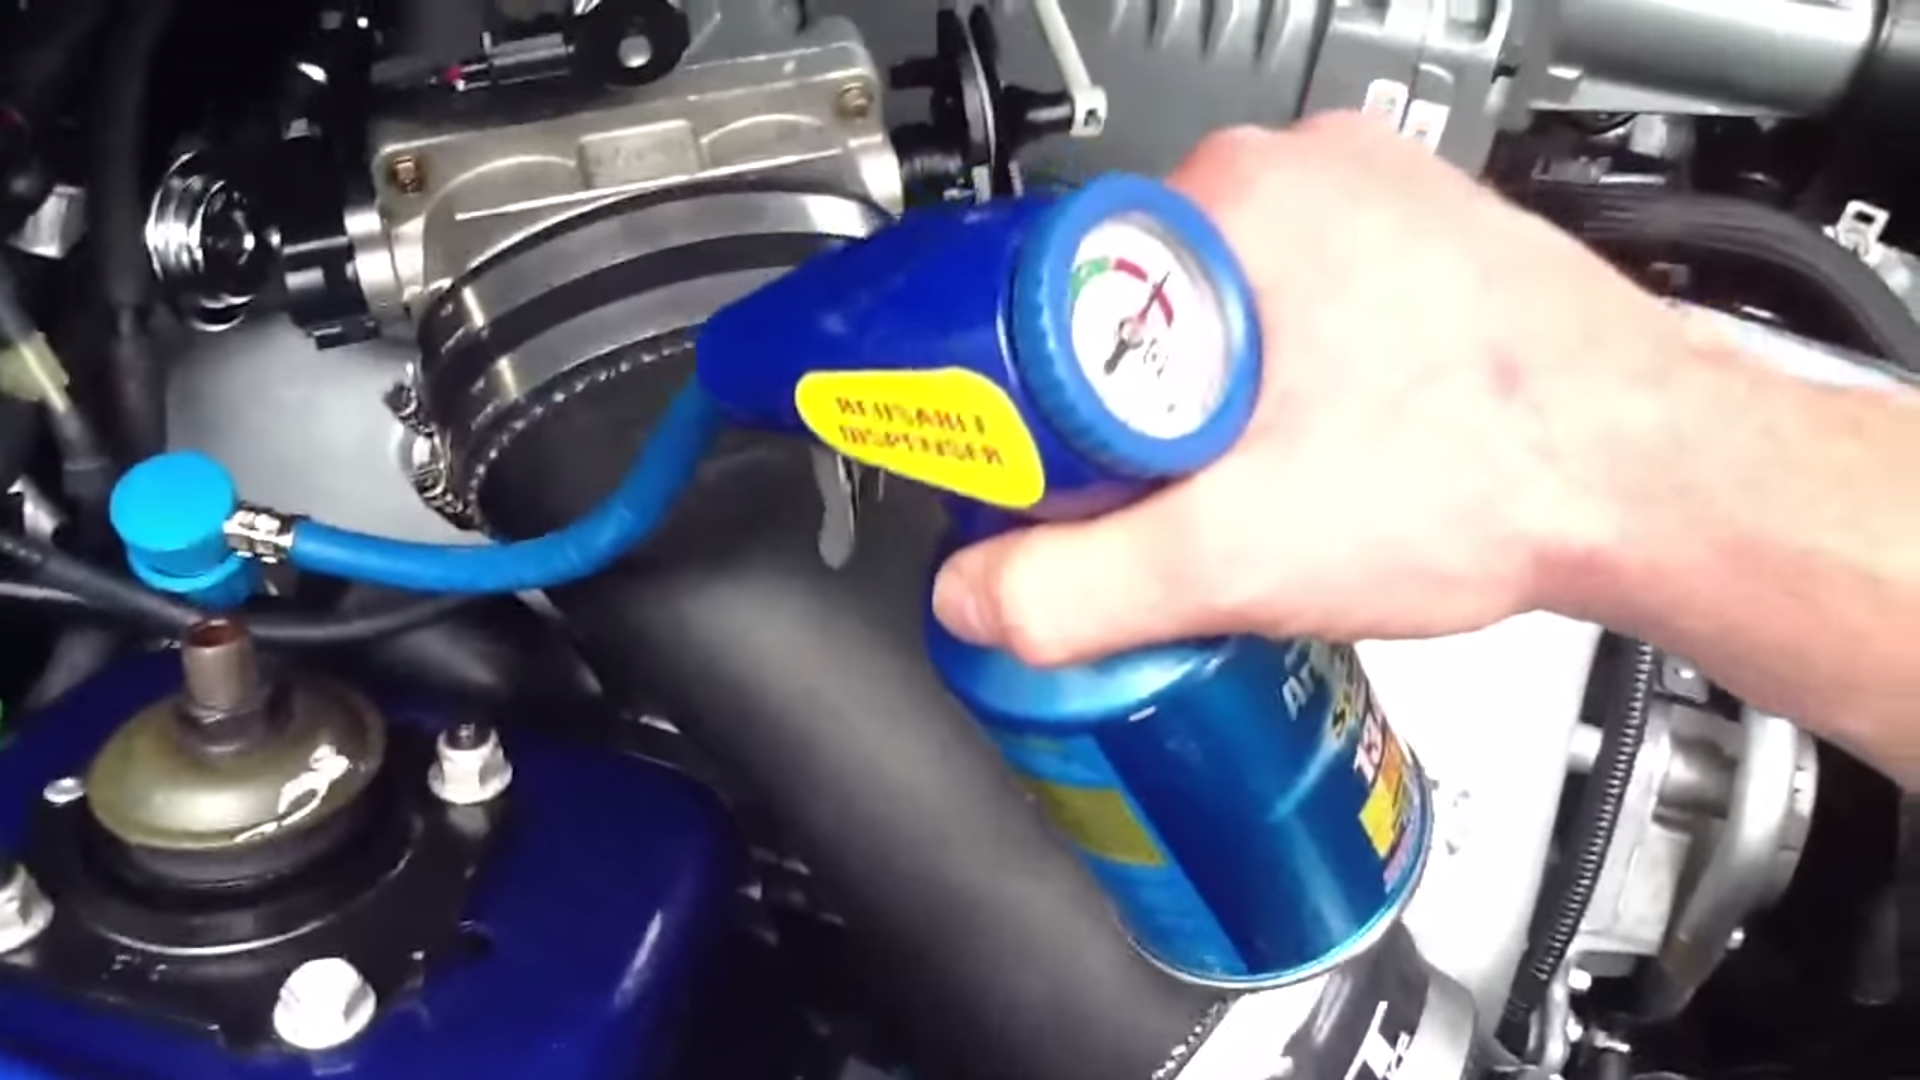
Step 4 – Check for refrigerant leaks
One of the most common problems in air conditioning systems is low refrigerant. Not only can this reduce the overall cooling performance, but it reduces the pressure in the system, which can cause the engine computer to disable to compressor completely.
There are several ways to check for leaks, but the easiest and least expensive is a good old fashioned soapy solution sprayed onto hose connections. Turn the A/C on and look for bubbles to appear. Repairing these leaks generally involves replacing O-rings, seals or hoses. After the repairs are made, the system will need to be completely recharged.
Step 5 – Check the system pressure
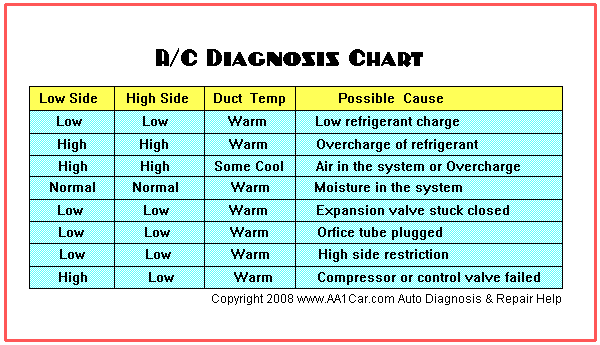
The best method of troubleshooting the A/C system is by using a gauge at the low and high pressure service fittings. Your service manual should show the normal PSI values for a variety of temperatures. In general, if your values are low at both the high and low pressure fittings, you likely have low refrigerant. If the values are almost the same, it's a likely indicator that the compressor is failing. The chart in Figure 4 shows a diagnosis chart for the different pressure readings.
Featured Video: How Car A/C Systems Work and Diagnostic Issues
Related Discussions
- Air Conditioning Problems - MustangForums.com
- No Cold Air From A/C - MustangForums.com
- A/C Cooling Fan Issues - MustangForums.com