Ford Mustang GT 2005-2014: Why is My Stereo Not Working?
Let's face it, we can drive without oxygen, but we can't drive without music. Read on to diagnose the stereo and find out why it's not working in your Ford Mustang.
This article applies to the Ford Mustang GT (2005-2014).
Nothing can ruin a nice drive more than a stereo that doesn't work. Diagnosing a non-working stereo isn't the hardest of processes. Before you go tearing up everything, you may want to check with your warranty; some forum members claim they got their whole stereo replaced in their Ford Mustang. If you tried all the buttons and it still won't go on, then read on to learn how you can diagnose it and discover the source of the issue.

Materials Needed
- 7mm socket
- Phillips head screwdriver
Step 1 – Check fuses
You could have a blown fuse.
The first and simplest step when it comes to electrical issues is to check the fuses. Some forum members state that the radio started working when they pushed all the fuses in without even checking them. However, locate both fuse boxes: the one under the hood and the one on the passenger side's kick panel. Under the hood, locate fuse F56 and check it to see if it's blown. If it's blown, replace it. On the inside fuse box, check fuses F20 and F6; if they're blown, replace them.

If the fuses are not blown, proceed to Step 2.
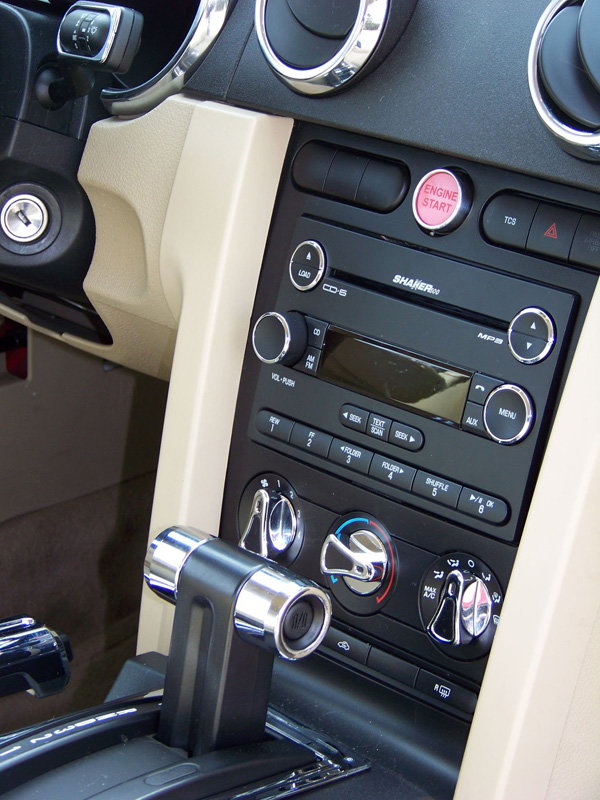
Step 2 – Check the connectors
They could be loose or worn.
This step requires a bit more work, simply because you have to remove the stereo to check the connectors behind it.
- Remove the two Phillips screws on the center console.
- Remove the trim around the shifter and the center plastic trim running from the arm rest to the stereo. You need to pop them off.
- Remove the two side panels on both sides of the stereo by simply pulling them out.
- Using your 7mm socket, remove six screws around the stereo, then remove the plastic trim around.
- Remove the four 7mm screws holding the stereo in place.
Now that the stereo is loose, pull it out gently and not all the way, juts enough so you can see behind it. Press on all the connectors to ensure they're connected properly. If any of the wires are completely worn, then that's your problem. If they are loose, pop them back in place and install everything back together.
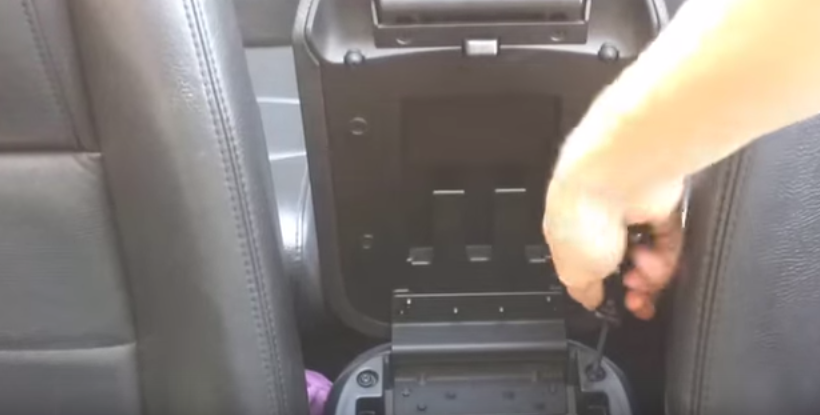
Figure 3. Remove center console screws. 
Figure 4. Remove center console trim. 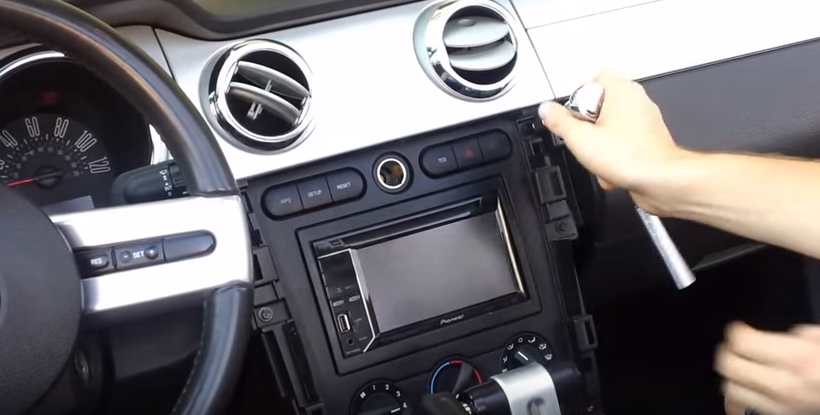
Figure 5. Six 7mm screws. 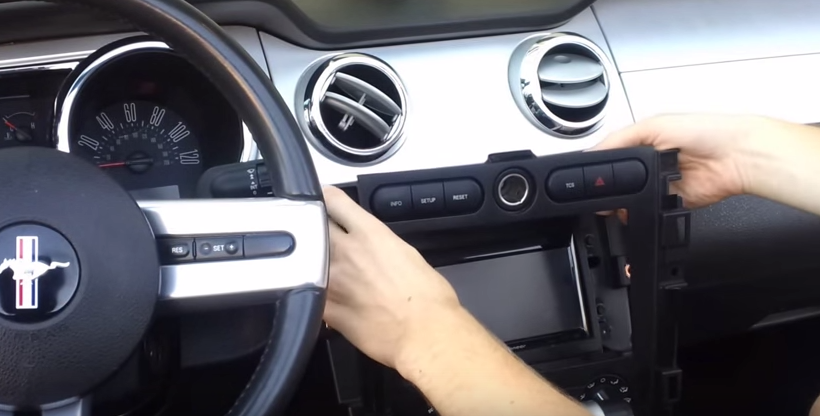
Figure 6. Remove stereo trim. 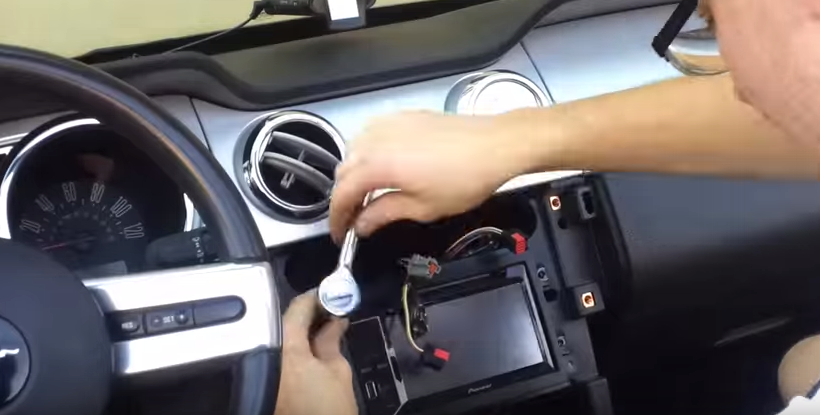
Figure 7. Four 7mm screws. 
Figure 8. Check stereo's connectors.
If the connectors are attached tightly, proceed to Step 3.
Step 3 – Visit dealership
It could be a bigger, electrical issue.
If the fuses and the connectors are fine, then the problem is in the wiring, which is a bigger job than a quick DIY. Check your warranty and they might replace the stereo or fix it for free. If not, then visit an auto electronic shop and they will test all the wiring to see if there are any wires that aren't receiving any current, in which case, they would replace the wire and run another one in its place.
Related Discussions
- Radio Won't Start - MustangForums.com
- Audio Issue - MustangForums.com
- Mustang Radio Not Working - MustangForums.com