Ford Mustang 1994-2014: How to Replace Brake Master Cylinder
Have your Ford Mustang's brakes lost that powerful feeling? It might be time for a master cylinder replacement.
This article applies to the Ford Mustang (1994-2014).
The brake master cylinder in your car plays a crucial role in making the correct amount of power needed for your brakes to operate. The brake system is essentially a hydraulic system, and one of the components required in a hydraulic system is a pressure supply. That is exactly what your master cylinder is responsible for. As you apply the brake pedal, it depresses a piston in the master cylinder, which applies pressure through the brake fluid and actuating the brake calipers.
The piston inside of the brake master cylinder and the walls of the cylinder itself is where the pressure is generated, as well as where the master cylinder can fail. The piston has seals that seal it against the walls of the cylinder. Brake fluid tends to be very corrosive, so over time as well as many miles can deteriorate the seals and also the walls of the cylinder. Another common cause of master cylinder failure is brake system contamination.
In case you have had any of these issues and are faced with a failed master cylinder, this article will explain how to remove and replace the master cylinder so that your brake system will feel as good as new.

Materials Needed
- Sockets sizes 10mm-15mm
- Ratchet
- Flare nut wrench sizes 12mm-14mm
- Flat head screwdriver
- Rags
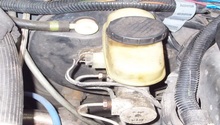
The brake master cylinder is located in the top right-hand corner of the engine compartment, as if you were standing at the front of the vehicle looking at the engine. So it will be right in front of where the driver is sitting. You can see it in the picture of the engine compartment below. It is #2.

Step 1 – Unplug fluid level sensor electrical connector
On these master cylinders, there is a fluid level sensor that will warn you if the fluid runs too low. You will want to disconnect this electrical connector from the sensor. A small flat head screwdriver should allow you to be able to depress the small plastic clip that secures the electrical connector in place.

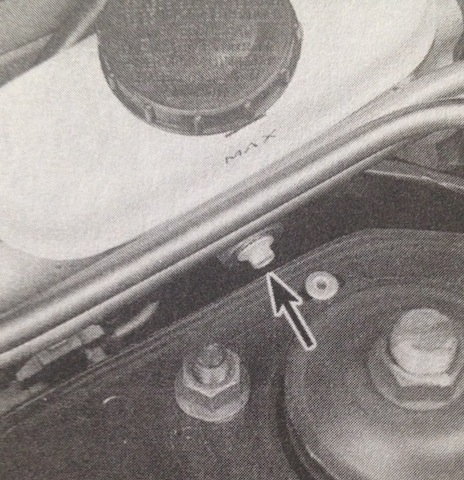
Step 2 – Detach bracket for clutch cable/shift interlock cable
The brake master cylinder is used as a mounting point for the bracket for the clutch cable on manual equipped cars, and for the shift interlock cable on automatic cars. A small bolt holds it in place. To remove the bracket, you will need to loosen and remove this bolt.
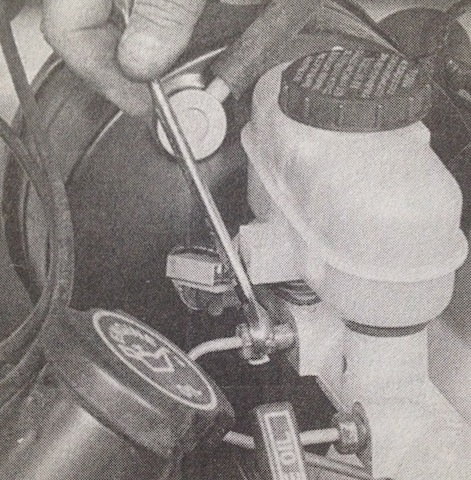
Step 3 – Disconnect brake line fittings from master cylinder
Make sure to plug the brake lines immediately after disconnecting them from the master cylinder to prevent air from entering the HCU. The HCU on this ABS system cannot be bled without a very expensive tool.
Place some rags under the master cylinder and be prepared to cover the lines as soon as they are disconnected. Using a flare nut wrench, loosen the brake line fittings from the master cylinder. You can use conventional wrenches to loosen the fittings, but flare nut wrenches will ensure that you do not round off the fittings.
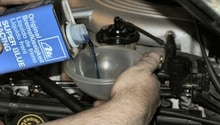
Step 4 – Loosen and remove master cylinder mounting nuts
There are two mounting nuts that secure the master cylinder to the brake booster. Removing these nuts will allow you to remove the master cylinder. After you have loosened the nuts, remove the master cylinder and dump out any leftover fluid that is still in the master cylinder reservoir.

Step 5 – Install new master cylinder
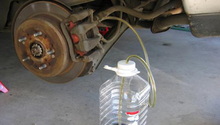
The steps of installation are the reverse of removal. Once you have everything connected and tightened, you will need to bleed the brake system at the master cylinder and also at each wheel. This is also a great time to make sure that the entire system has new, fresh brake fluid.
- Slide the master cylinder over studs on brake booster.
- Thread the mounting nuts onto studs and tighten.
- Thread the brake line fittings into the master cylinder and tighten.
- Reattach the bracket and bolt the clutch cable/shift interlock cable.
- Reconnect the electrical connector for the brake fluid level sensor.
- Bleed the brake system.
- Perform a test drive.
Related Discussion
- Master Cylinder and Brake Booster - MustangForums.com