Ford Mustang GT 1996-2004: How to Replace Spark Plugs and Ignition Coils
The spark plug ignites the air-fuel mixture inside the engine. Spark plugs are exposed to high levels of heat and pressure while inside the engine, yet the factory spark plugs are designed to last over 80,000 miles. Once a spark plug reaches the end of its service life, the driver may notice reduced throttle response, engine power, and fuel economy.
This article applies to the Ford Mustang GT (1996-2004).
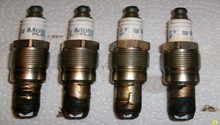
A spark plug consist of a plated metal shell, a ceramic insulator, and an electrode extending through the center. High levels of voltage generated inside the coil packs reach the terminal, and then move down to the center electrode. This is when the spark between the center electrode and the ground electrode occurs. The spark plug seals the combustion chamber, which requires the final torquing to be accurate for problem-free operation. This torque spec affects spark plug cooling, which determines spark plug life and engine performance related concerns. As the spark travels from the center electrode to the ground electrode many times over its years, the electrode tip gap begins to widen. Once the spark plugs available voltage level drops below the required voltage level, it will no longer ignite the fuel and result in misfires.

Materials Needed
- 5/8" spark plug socket (prefer extended type)
- 6" extension (prefer wobble type)
- 3/8" ratchet
- Flat head screwdriver
- 9/32" wrench or socket
- Rubber gloves
- Safety glasses
- 8 new spark plugs that meet factory specifications
- Anti-seize
- Gap tool
- Long needle nose pliers (optional)
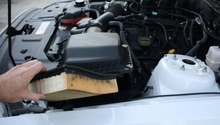
Step 1 – Remove the air intake tube
Loosen the two metal hose clamps by turning them counterclockwise with a flat head screwdriver. Pull the two air hoses off the right side of the intake. You may have to twist these as you pull if they are hard to remove.
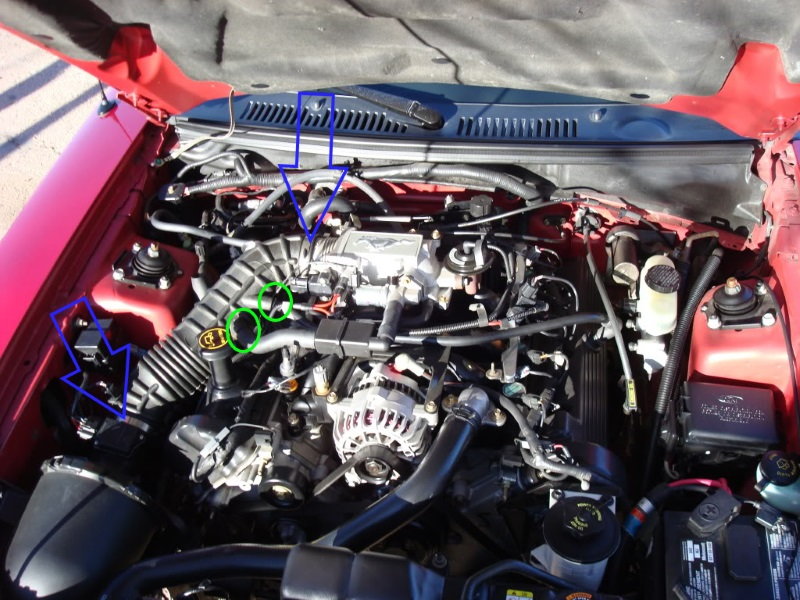
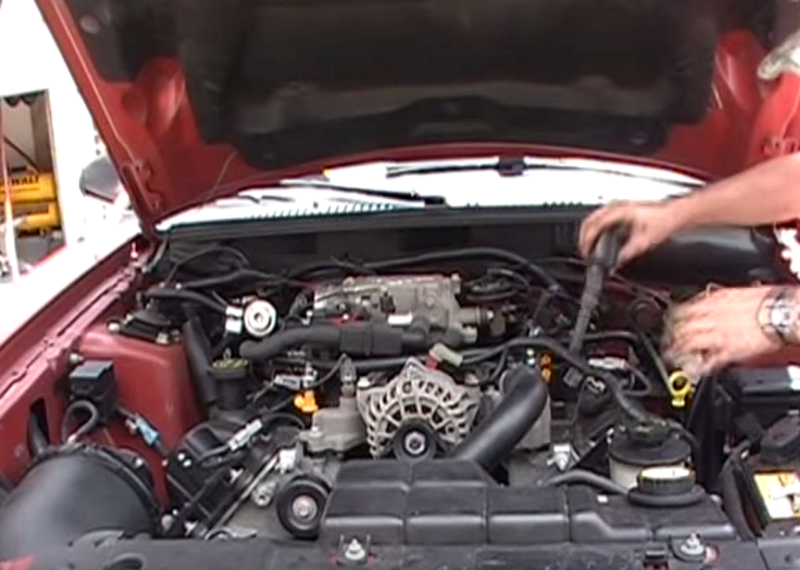
Step 2 – Unplug coil pack and injector on number four cylinder
The number four coil pack is directly next to the firewall on the passenger's side of the engine. The coil packs line up front to back on top of the engine next to the inner side of the valve covers. Due to space constraints, the number four coil pack must be unplugged for removal. The angle required to remove may damage the electrical connector. The fuel injector connector is removed for space constraints, as well.
When removing the fuel injector connector, note the red gasket around the edge. Make sure this gasket is in the same place during re-installation.
Long needle nose pliers or an electrical connector separation tool can be used to make the job easier. Look for the flexible tab on the electrical connectors and squeeze it while simultaneously pulling the connector away from the coil pack/injector.
Step 3 – Unbolt and remove the coil packs
Remove the 9/32" bolt on the top of the coil packs. Once the bolt is removed, the coil packs can be pulled off the engine, exposing the spark plug tube hole. You may need to twist while you pull if the coil pack is difficult to remove.
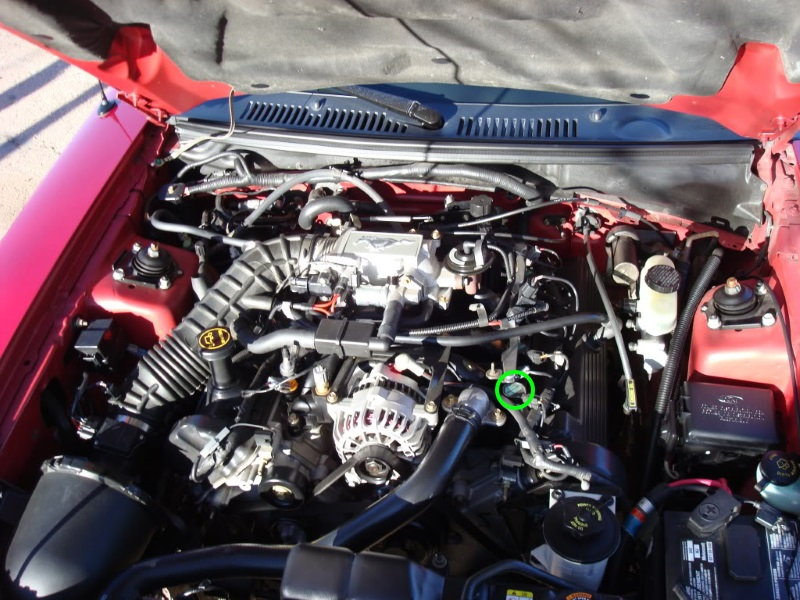
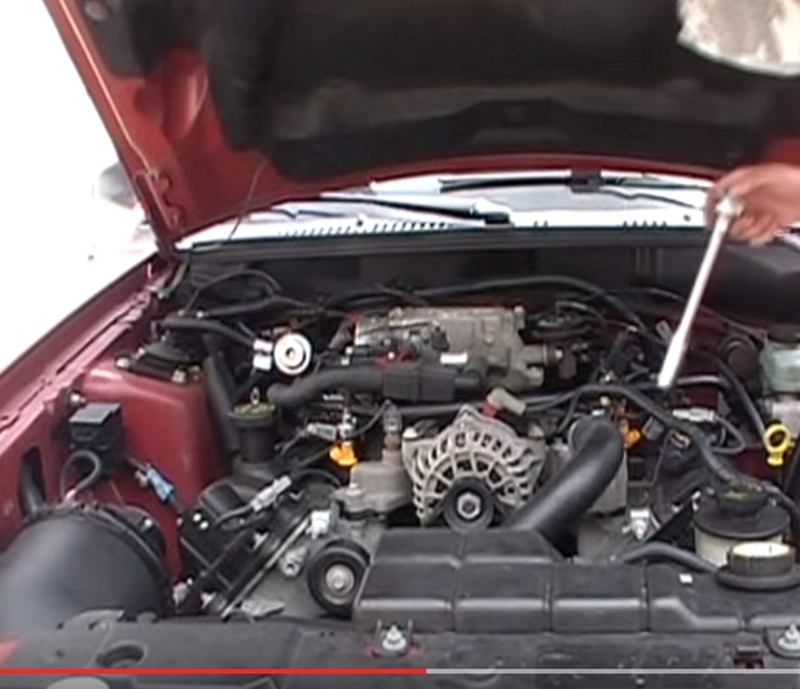
Step 4 – Remove the spark plugs
Use a 5/8" spark plug socket with a 6" extension to remove the spark plugs. A wobble extension with an extended reach spark plug socket work best for those areas with tight clearance.
As your turning the ratchet, make sure it's positioned in line with the spark plug tube, otherwise you can damage the threads inside the cylinder head.
Once the plug is loose enough, the spark plug can be turned with just the extension.
Step 5 – Check the gap on the new spark plugs
Your spark plugs need to be gapped at 0.054". If your engine is modified, the gap will need to be closer to .050" (the more modified your engine is, the lower it needs to be).
Do not gap iridium tipped spark plugs. The iridium is easy to break. Open the ground electrode with your gapping tool by carefully prying against it. The ground electrode can be pressed downward against a hard surface to make the gap smaller.
A small amount of anti-seize can be placed on the threads if desired.

Featured Videos: 2002 Mustang GT Spark Plug Change
-
Part One
-
Part Two
-
Part Three
Related Discussion
- How to Change Spark Plugs - MustangForums.com
- Coil-on-Plug Information - MustangForums.com
- Spark Plug Gap - MustangForums.com