Ford Mustang GT 1996-2004: How to Install T-56 Manual Transmission
Besides the initial cost of a transmission swap, performance enthusiasts see no drawbacks to installing a T-56 6-speed transmission. In fact, the T-56 has proven to out-perform the original 5-speed transmission on all fronts. To make things sweeter, a transmission swap can be completed within a few hours from the comfort of your garage.
This article applies to the Ford Mustang GT (1996-2004).
As time passes and enthusiasts develop new ways of making additional torque and horsepower, reinforcement of various drivetrain components becomes critical. In the case of the SN95 Mustang GT, the gearbox of choice to cope with increased performance is the Tremec T-56 6-speed transmission. Not only is the T-56 reinforced to handle more power, but it has a closer gear ratio spread to improve acceleration and an additional set of over-driven cogs to reduce fuel consumption while cruising. While standard T-56's are rated to support a healthy 450 lb-ft of torque, "Magnum" units can handle just about anything that is thrown at them. In short, the T-56 has become the most versatile transmission on the market, and will mostly likely be the first and last tranny you buy for your Mustang. The best news is that many companies are offering complete kits to allow for a hassle-free swap with little to no modification. Whether you are looking for buttery smooth shifts, increased performance capabilities, or simple replacement of a broken or tired OEM transmission, the T-56 will take your Mustang GT to the next level.
Materials Needed
- Floor jack and jack stands
- Transmission jack or bottle jack
- Metric and American wrench and socket sets
- 3/8" and 1/2" drive ratchets and extensions
- Universal joint and wobbler extensions
- Torque wrench
- Pry bar
- Wire strippers/crimpers, or soldering iron (optional)
- Catch pan
- Shop rags
Step 1 – Remove original transmission
As would be expected with a transmission swap, the first order of business is to yank out the old transmission.
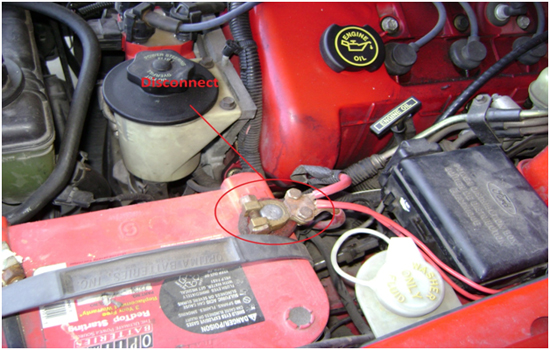
- To begin, disconnect the battery.
- Inside of the car, remove the shift knob by simply unscrewing it from the shifter lever. Remove the shifter panel plate by lifting upwards until it pops out of place. Be sure to disconnect the cigarette lighter before completely removing the panel.
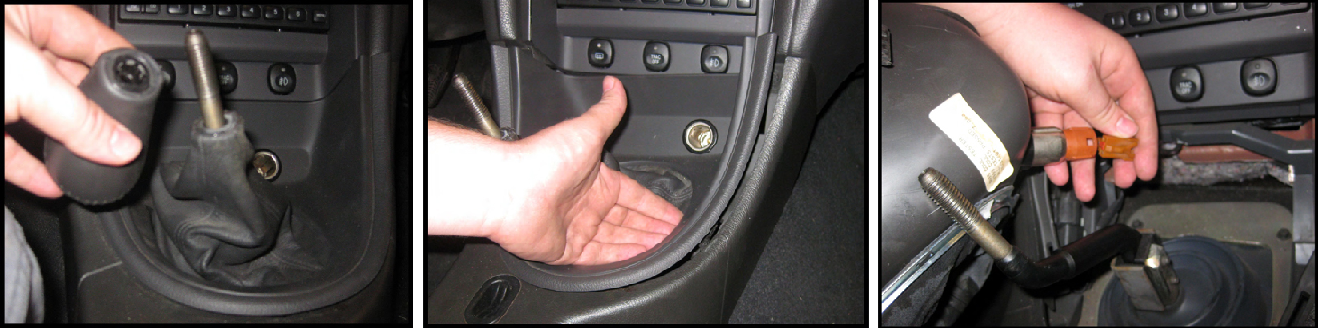
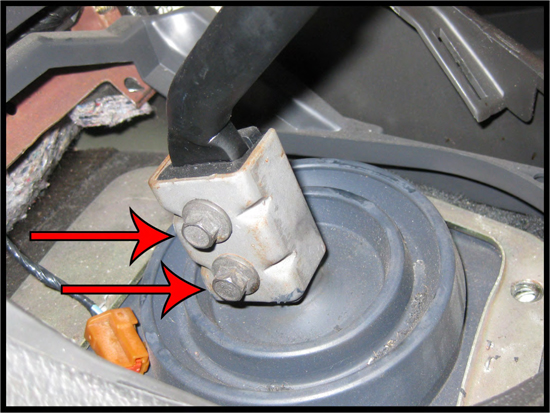
- The shift lever can now be removed by unscrewing the two fastening bolts at the base of the lever.
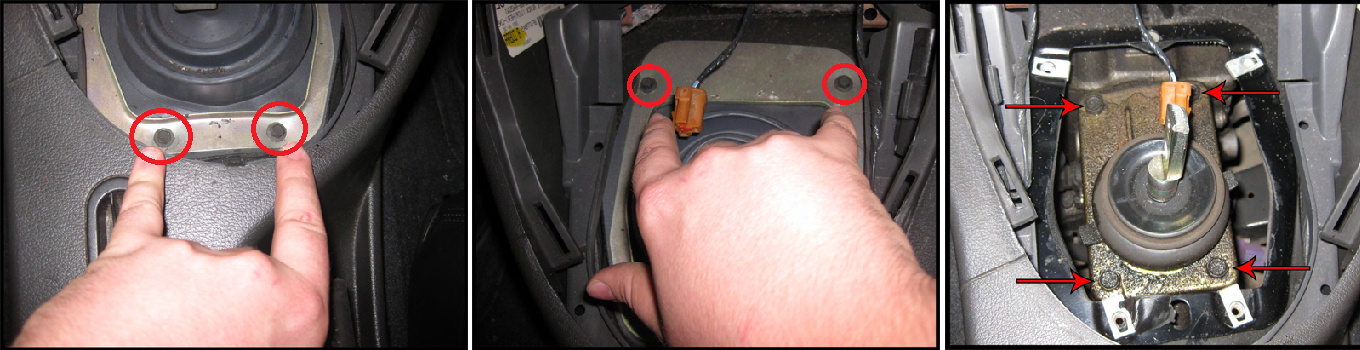
- Next, remove the four inner shifter boot bolts and lift the boot out of the way. Underneath are four additional bolts that need to be removed to separate the shifter base from the transmission.
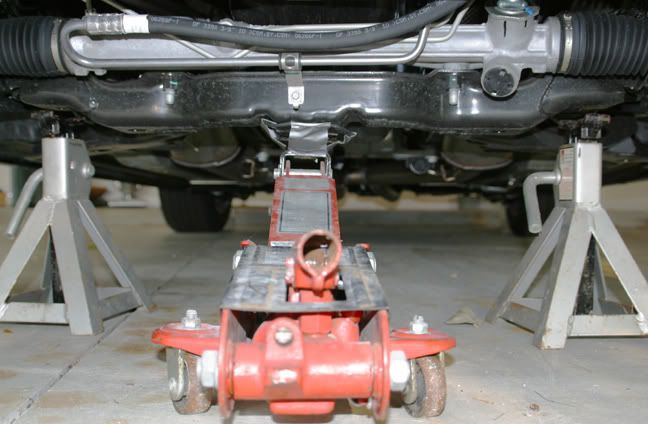
- With the work inside of the cab completed for the time being, proceed with lifting the car and supporting it with jack stands. (Refer to the article How to Jack Up Your Car.) If your car is fitted with long tube headers, you may consider removing the headers before completely lifting the car.
- With the car supported, proceed with removing the starter and H-pipe. These two components are best removed together, as it is a tight squeeze to get to the H-pipe collector bolts with the starter in place and vice-versa. Be sure to remove the wiring from the starter solenoid, and remove the three bolts holding the starter in place. Most owners agree that easiest access to the starter bolts involves using a ratchet and long extension(s) coming in from the front side of the vehicle. Before removing the the H-pipe, be sure to disconnect both oxygen sensors. After the starter and H-pipe have been removed, you now have access to the driveline.
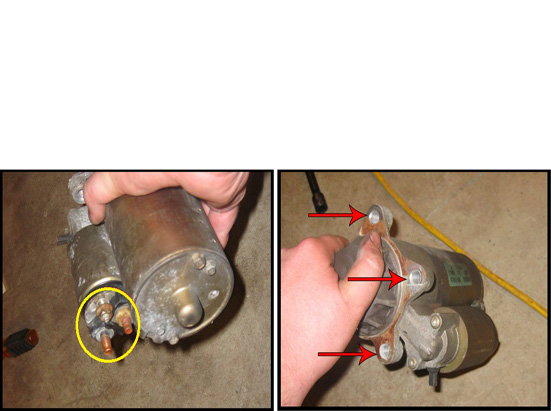
Figure 6. Starter solenoid and starter mounting bolt holes. 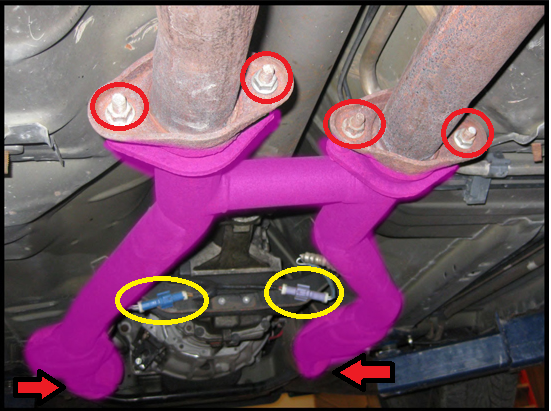
Figure 7. H-pipe and O2 sensor removal points.
- It is recommended that the transmission fluid be drained prior to removing the driveline to prevent any messy oil spills.
- There are four 12-point bolts securing the driveline to the differential flange. By removing these four bolts, the rear of the driveshaft will drop down and the front of the driveline attached to the splined transmission yoke can be slid out of the transmission. If you opted not to drain the transmission, have a catch pan handy to collect any transmission fluid that leaks by the output shaft seal.
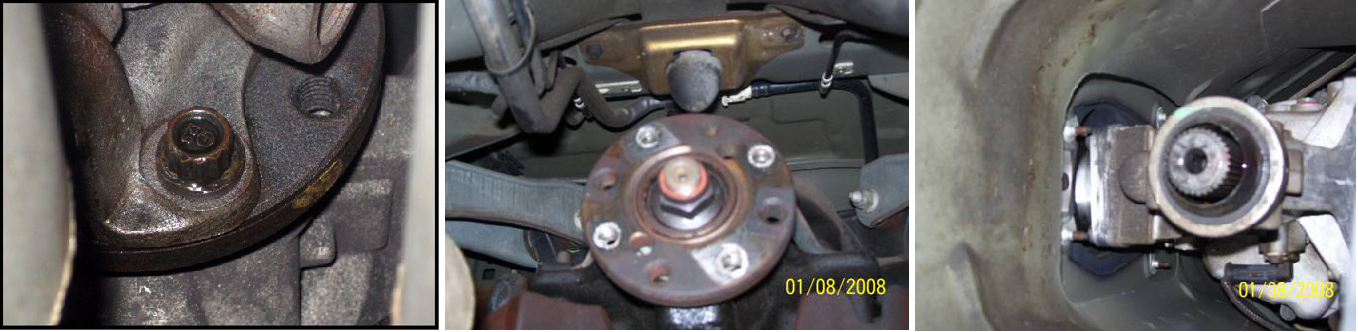
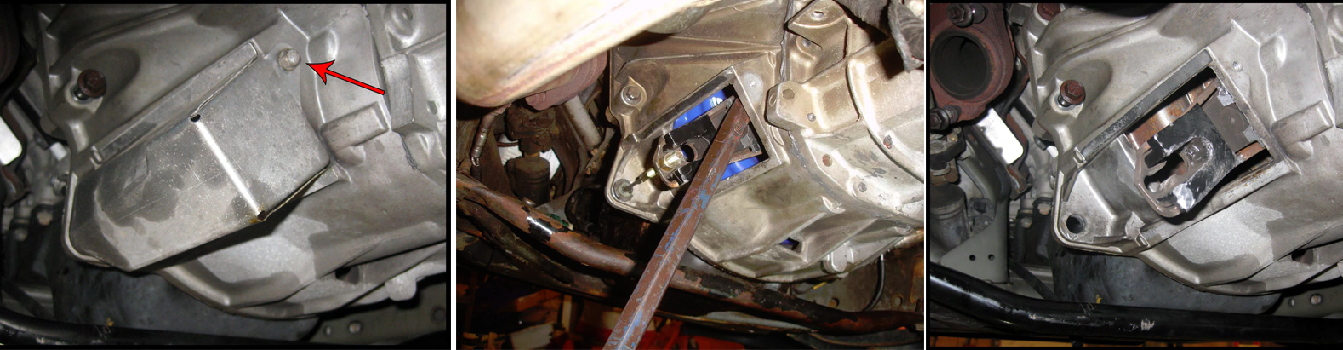
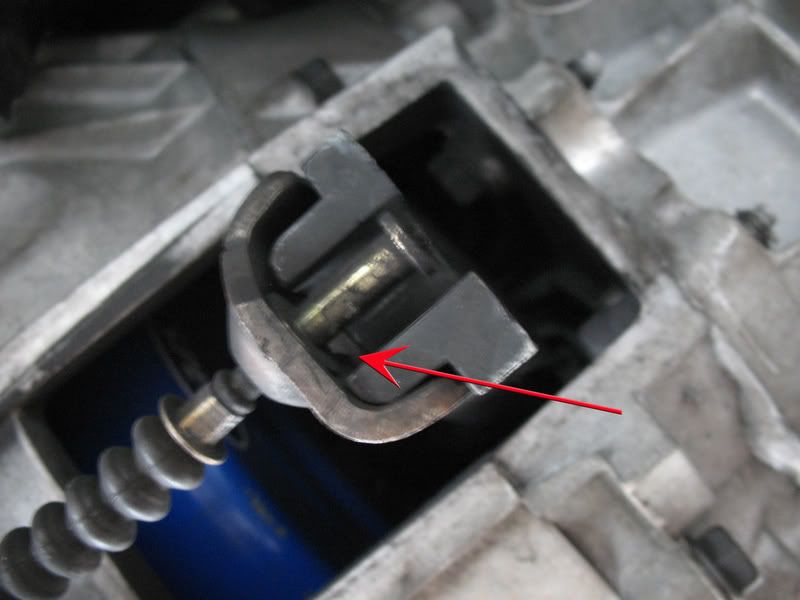
- The next step involves removing the clutch release cable from the clutch fork. On the left side of the transmission is a small cover held in place with a single bolt that needs to be removed to access the cable and fork. Using a pry bar or similar, apply pressure to the fork and slide the cable out of its groove. Remove the small cable retaining clip and slide the cable out of the transmission housing.
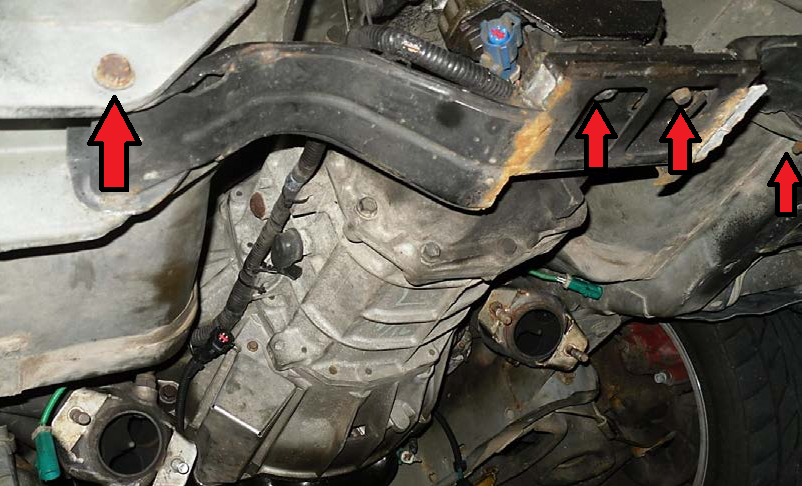
- Using a jack, support the rear of the transmission to allow for the crossmember to be removed. There are four to six fasteners in total depending on the vehicle: two on the tail of the transmission and between one to two on each side securing the crossmember to the chassis. With these removed, the crossmember can be set aside.
- Remove all of the bell housing bolts securing the transmission to the engine. Before removing the transmission, be sure that all electrical wiring and connectors, such as the reverse light switch and speedometer sensor, are disconnected and tucked safely out of the way.
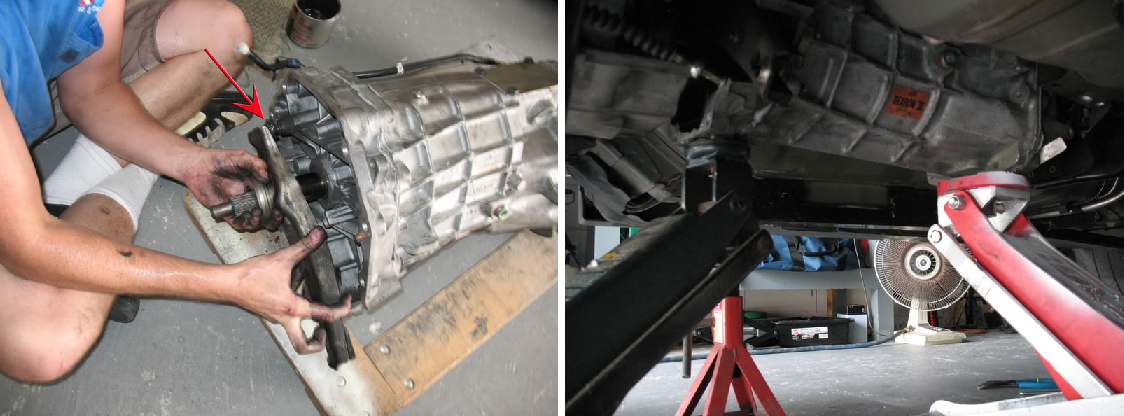
- The transmission can now be slid backwards and angled slightly downwards for removal. While a transmission jack or regular car jack is recommended to aid in transmission removal, the stock transmission can sometimes be manhandled, as it weighs approximately 120 lbs. Having a couple of extra hands from a friend can be helpful, as well.

Step 2 – Prep new transmission
For the most part, the T-56 swap is pretty much plug-n-play; however, a few minor things need to be addressed before the install.

- The T-56 uses a reverse lockout switch to prevent an accidental shift into reverse when shifting from 4th to 5th gear. Unfortunately, the Mustang does not incorporate wiring for this feature, so steps must be taken to ensure shifting into reverse when needed can be executed properly. If you are installing a T-56 kit from a reputable company such as D&D performance, a lockout controller is often included that simply plugs into the solenoid to allow for shifting into reverse at five MPH or less.

- If you are piecing together your own components for the swap, Samco Industries offers a reverse lockout controller box that can be easily wired in to retain normal reverse lockout functionality. Conversely, a popular solution is to wire a dash activated switch to the solenoid to allow reverse to unlock at the flip of switch. Some have also used a relay wired into the brake lights that allows for the reverse gate to unlock while your foot is on the brake. The final options are to either shim the lockout solenoid away from the transmission or modify the internal springs. While not recommended, either of these last two options will allow the shifter to override the lockout with increased force on the shift lever.
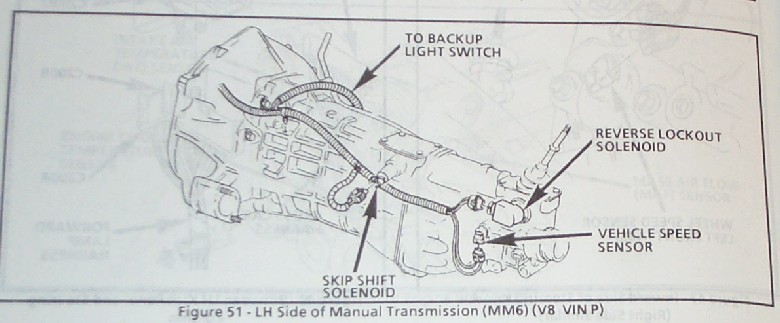
- The reverse light wiring, in most cases, should plug right in to the sensor located on the transmission. Most kits will provide a lengthened pigtail, as the sensor is on the opposite side of the transmission; however, lengthening of the stock wiring can be easily done to allow for proper reach. The speedometer wiring should be completely compatible with the stock wiring, as well.
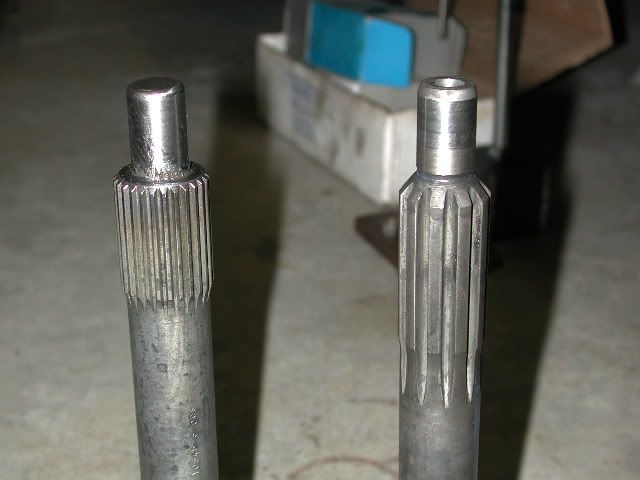
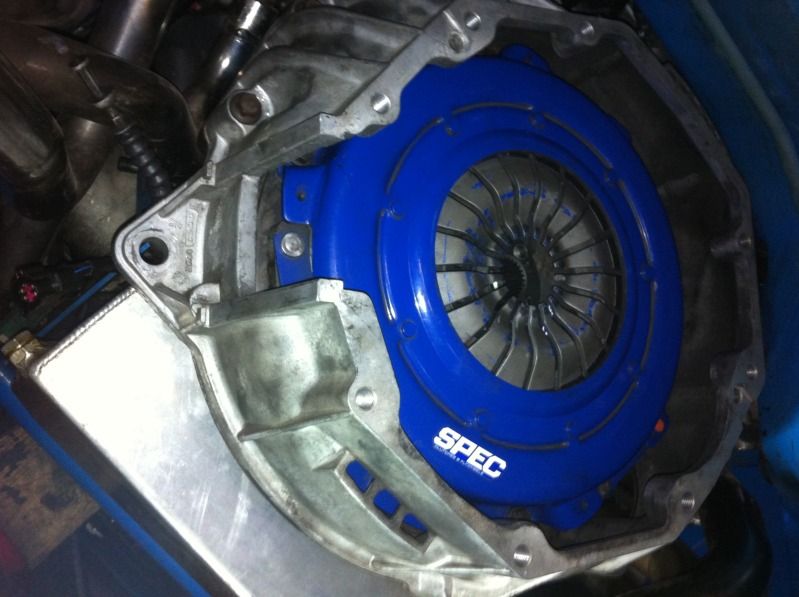
- Lastly, you need to ensure your clutch is compatible with the T-56 transmission you will be using. T-56 transmissions can have a different number of input shaft splines, with many upgraded units coming with a 26 tooth input shaft. Make sure your desired clutch or clutch kit is matched to your transmission, as getting to the point of installing the transmission only to find you have an incompatible clutch can be frustrating, to say the least.
Step 3 – Install transmission
With all necessary prep work done on the transmission as well as having your choice of clutch installed, installation of the new T-56 transmission is straightforward.
- The T-56 uses a separate bell housing that is not permanently attached to the transmission housing. This allows for a much easier install. Bolt the bell housing up to the engine, making sure the longer bolts are used in the holes fitted with dowels, and torque the bolts to approximately 40 ft/lbs.
- Using a jack, proceed with installing the transmission. It is crucial that the transmission be angled correctly to allow the input shaft to properly slide into the clutch assembly; otherwise, it is nearly impossibly to mate the transmission to the bell housing. Be sure your clutch release fork and clutch release bearing are properly in place, as well.
- With the transmission in place, install all transmission bolts and torque to approximately 35 ft-lbs.

- Proceed with installing the new or modified crossmember to the chassis and tail of the transmission. Due to the increased length of the T-56, the crossmember is placed further rearward compared to the stock unit. Torque to transmission mount fasteners to approximately 35 ft-lbs, and crossmember to chassis bolts to 75 ft-lbs.
- Next, install the shortened driveline. Using a bit of Blue Loctite on the differential flange bolts, tighten to 75 to 90 ft-lbs.
- Connect the wiring to the speed sensor, reverse light, and reverse lockout solenoid.
- Route clutch the cable through the bell housing and attach it to the clutch release fork.
- Reinstall H-pipe and starter. Torque the manifold flange/H-pipe nuts to 30 ft-lbs, H-pipe/muffler nuts to 26 ft-lbs, and starter bolts to 17 ft-lbs. Do not forget to reconnect the oxygen sensors and starter solenoid wiring.
- Depending on which T-56 transmission you are using, fill with four quarts of either Dexron III equivalent automatic transmission fluid or GM synchromesh fluid.
- Inside of the cab, secure the shifter base, inner shifter boot, and shifter lever in place. Reinstall the shifter panel and shift knob.

- Check for proper clutch operation, reconnect battery, and enjoy your new transmission!
Related Discussions
- T3650 to T56 Swap with Instructions - MustangForums.com
- Tremec T56 Swap into 01 GT - MustangForums.com
- Transmission Removal T3650 - MustangForums.com