Ford Mustang V6 and Mustang GT 1994-2004: How to Flush Radiator
Flushing your radiator is very good practice if you want to prolong the life your engine.
This article applies to the Ford Mustang V6 and Mustang GT (1994-2004).
Flushing your radiator is a job that is often overlooked by Mustang owners until problems start surfacing. Don't neglect this easy DIY maintenance job if you want your car running in tip-top shape. There are several different methods of flushing that you can do and you'll read various opinions on the correct way, versus using a shortcut. There are some things that are easily overlooked that can come back to bite you if you aren't careful. If you have any doubts as to how to do this job, shop around for a good pro. They likely will not charge you an arm and a leg, but you can still do it a lot cheaper if you feel up to the task. There are no special tools needed unless you want to purchase a flush kit, which is completely optional and a little more difficult the first time, but will make future flushing jobs easier. Just give yourself plenty of time and plenty of empty storage containers to capture all the nasty stuff that is going to come out of your cooling system.

Materials Needed
- Several bottles of coolant
- Flush kit (optional)
- Flushing additives (optional)
- Garden hose
- Plenty of large capacity catch containers
- Shop rags
- Floor jack and jack stands
- No-spill or other large capacity funnel
Please be sure to dispose of the used fluids responsibly. Most oil change shops will take in your used fluids at no cost. Make doubly sure that you clean up any spills and please do not let the nasty stuff drain into your sewer system or into the gutter. Radiator fluid is like sweet smelling candy to pets as well as wildlife and it is extremely toxic. Any animal that ingests it has almost a 100% chance of dying a very painful death.
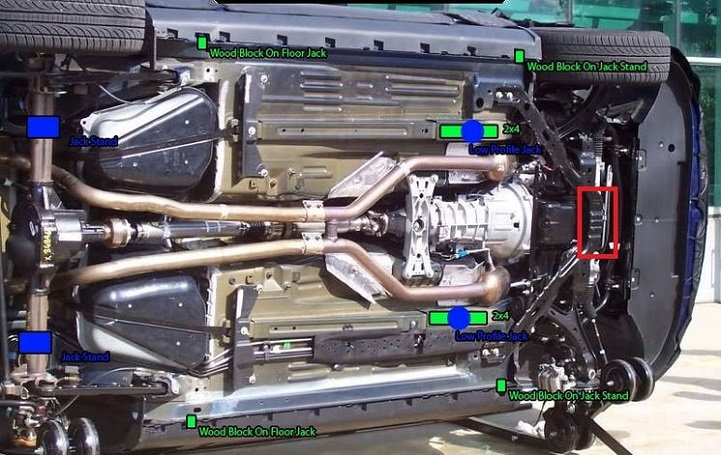
Step 1 – Jack up your front end
While this is not a required step, it will make the job easier because you'll have more room to maneuver beneath your vehicle. Use the correct jack stand locations for your Mustang. For a complete system flush, you'll want to get to the engine block drain valves, which will be difficult to do without your car raised.
Pro Tip
Never work under your car using a hydraulic floor jack alone, so either use jack stands or ramps. Be sure to chock the rear wheels in the front and rear positions of the tires.
Step 2 – Add radiator flush to the radiator (optional)
Some folks advocate using a radiator flush to your radiator before draining the old. This is an optional step and it will add time to your job. It's efficacy is questionable, but for an added piece of mind that you got your engine really clean, it is an inexpensive step. If you have the time, pick up a bottle from any supply store and add it directly to the radiator. Start your Mustang and let it run for about 10 to 15 minutes. You can also step on the throttle and let the car heat up well enough that the thermostat opens in order to get the cleaner to circulate through the heater core. If you do this and aren't doing this job outside, be sure to open your garage doors to get a lot of ventilation. After you have done this step, be sure to let your engine cool down before proceeding to the next step.
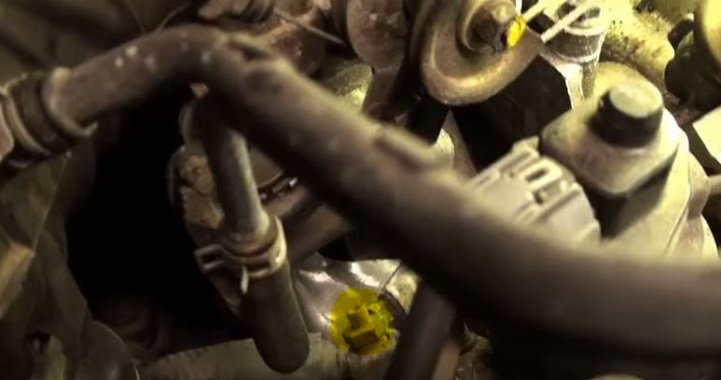
Step 3 – Remove radiator cap and drain plugs
After you have let plenty of time pass to cool your engine completely, remove the radiator cap. Get under your car and use a wrench on the drain plug located on the bottom of the radiator on the passenger's side. This is a white plastic plug, so be careful not to destroy it with your wrench. This is a good time as well to check the condition of your radiator cap. It is a cheap part, so replacing it is a nice piece of insurance. Be sure to have your catch basin ready to go when you remove the drain plug, as the fluid is going to come out with some force. This is another reason to let the engine cool before doing this step. Use another catch pan under the engine block and remove the drain plugs there. This will ensure that you are getting the old stuff out of the engine block as well. The block drain plugs should be on either side of the block by the frame rails near the motor mounts. Note that the 5.0L engines do not have block drain plugs.
Pro Tip
NEVER open a radiator cap on a hot engine!
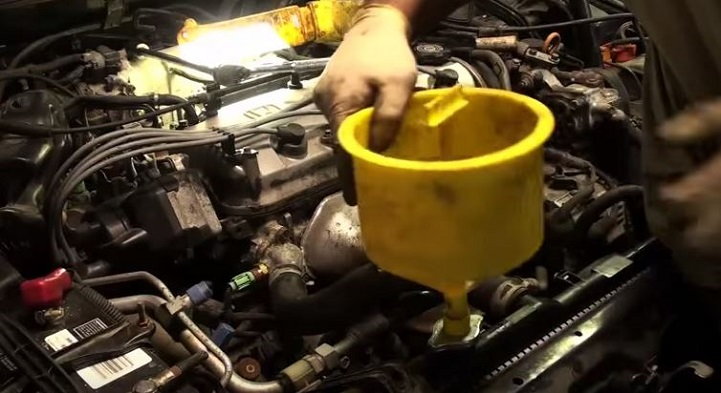
Step 4 – Attach a garden hose to radiator fill hole
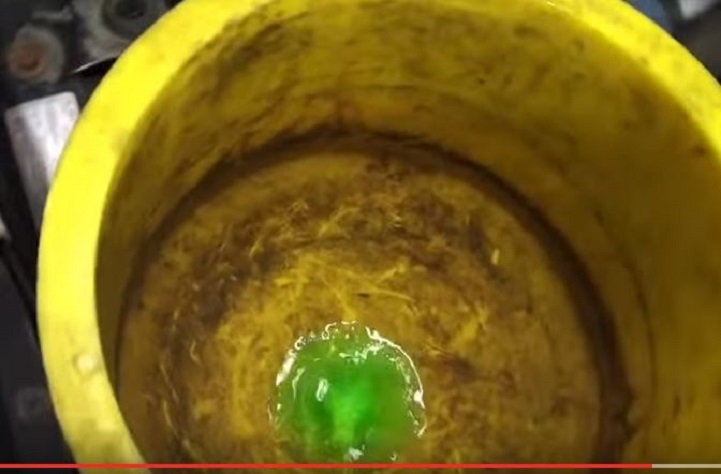
Put your garden hose up to the fill hole on your radiator and turn on the water supply. Watch for the water exiting the drains and stop the flow when it starts running clear. Make sure you have plenty of volume in your catch basins. Let it completely drain through the plugs before replacing them. Alternatively, you can also flush from the lower radiator hose, or use both methods for a complete job.
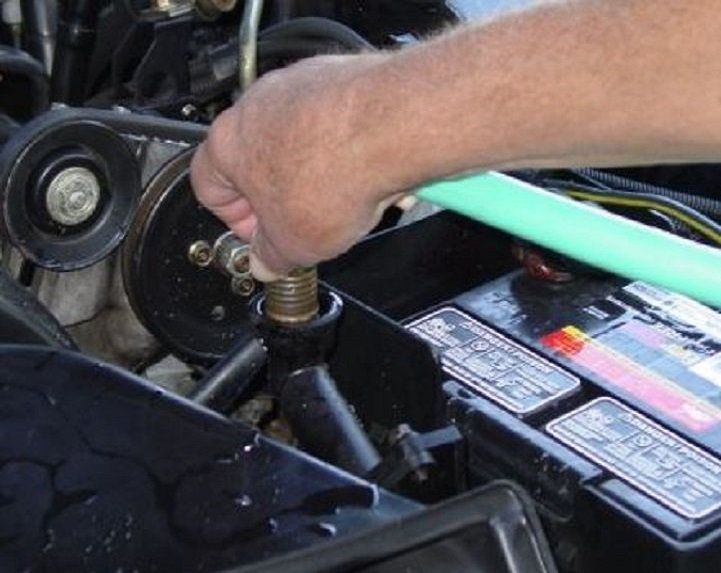
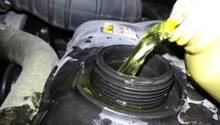
Figure 4. Flushing from above. 
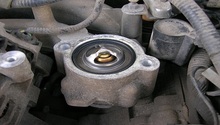
Figure 5. Flushing from below the lower radiator hose will ensure you get the sludge out of the hoses.
Step 5 – Replace drain plugs and connect funnel to fill cap
Replace the drain plugs and tighten about 3/4 of a turn past snug. Wipe the area around the plugs to detect any leaks when the job is done, so you can re-tighten them if needed. Most auto supply stores will carry non-spill funnels that have a huge reservoir and an attachment that replaces the radiator cap. Connect the attachment and add the no-spill funnel to it. You'll have less mess to clean up using this tool.
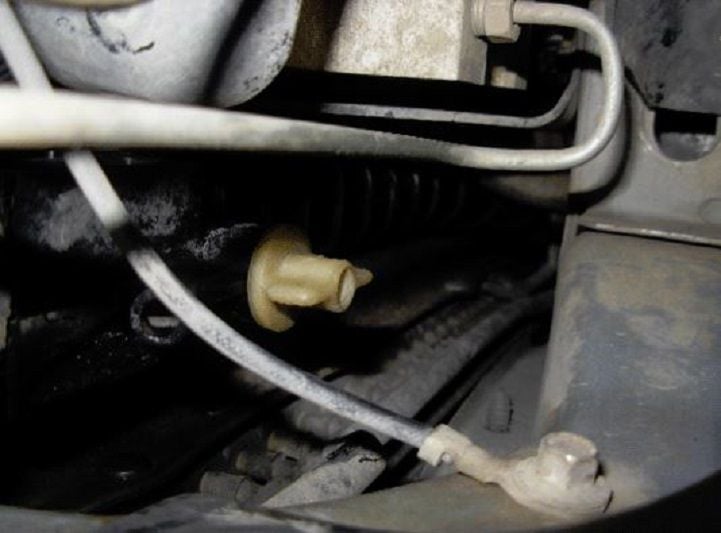
Step 6 – Open the bleeder screw
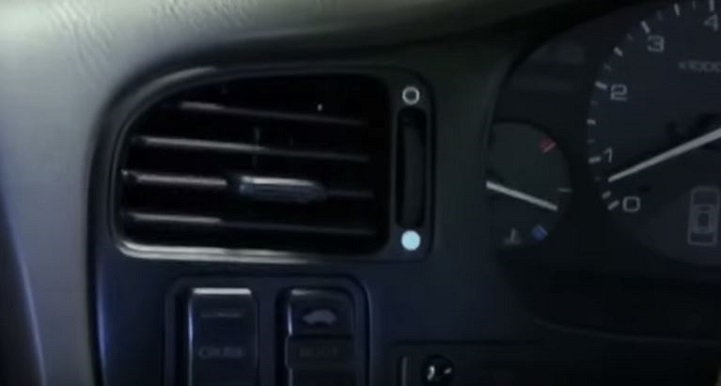
There is a small bleeder screw near the water pump. You will want to open this up, which will burp and purge the air out of the system. Air bubbles in the system is a common complaint for Mustang owners who have a lack of heat problem with their climate controls in the car.
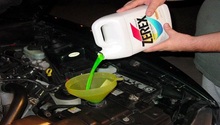
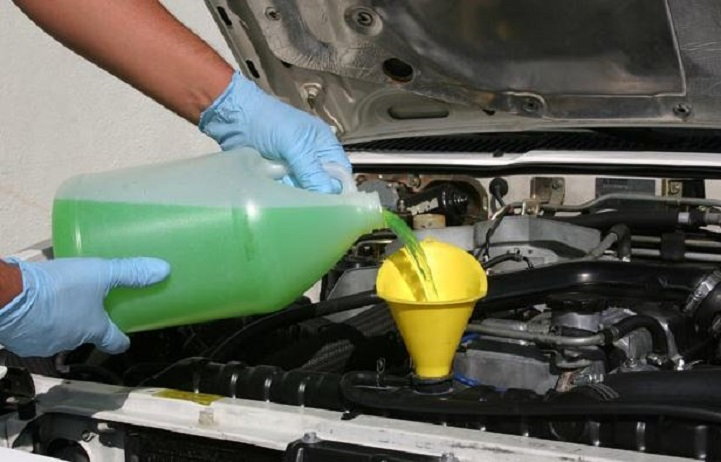
Step 7 – Add new fluid to the radiator
With the no-spill funnel attached to the radiator, this job is pretty simple and not so messy. Start pouring the radiator fluid (50:50 mix with distilled water only) into the giant funnel, but keep an eye on the bleeder valve. A helper comes in very handy for this job if someone is available to assist. As soon as the fluid starts coming out of the bleeder valve, you will want to tighten it back down until it is no longer leaking. This helps in keeping air bubbles out of the system. Once you have completed the job, you will want to open that bleeder valve again and burp the supply hose to ensure there are no air bubbles in the lines. Watch the level of the fluid in the funnel and stop adding more when it starts backing up into the filter. At this point, make sure that there are no leaks at the bleeder valve and the drain plugs. Start your Mustang and let it warm back up. You will want to turn the heat to max without the blower turned on. Once it is warmed up, you will want to open up the throttle until you hear the thermostat kick on. This will ensure that you have fluid traveling through the system and into the heater core. Shut the car off, check the fluid level in the funnel. Make sure that it is full and remove the funnel. Replace the radiator cap. Check the fluid level in the overflow tank and make sure that it is at the indicated full line. You do not want to over-fill the reservoir.
Step 8 – Restart the engine and take a short test drive
After you have filled the radiator and the reservoir, start the engine to let it warm back up. Take a short test drive, paying attention to the temperature gauge and watch for any check engine warning lights. Let the engine cool again, check for leaks, check the reservoir level. Add more fluid to the reservoir if needed. Re-tighten any fittings that show signs of leakage.
Featured Video: How to Flush Cooling System
Related Discussions
- How to: Flush Radiator - MustangForums.com
- Radiator Flush Questions - MustangForums.com
- How Do You Flush the Cooling System on '97 4.6? - MustangForums.com
- Uncertain Where the Plug/Bolt is to Drain Radiator - MustangForums.com
- Help with Radiator Flush and Heater Issue - MustangForums.com