Ford Mustang V6 2005-2014: How to Flush Radiator
There are many different opinions as to when you need to flush your cooling system, but the important thing is that you flush it and here's how.
This article applies to the Ford Mustang V6 (2005-2014).
Flushing the cooling system on your Mustang is one of those jobs that no one ever really wants to do. Not because it's a hard job, but because it is rarely done and knowing exactly how to do it has become somewhat of a mystery. It's a pretty straightforward job and not difficult at all. You can choose whether or not to purchase a flush kit or do the job without. The choice is yours; while the initial job using the flush kit may take a little longer, subsequent flushes are made much quicker by utilizing the installed flush valve. The job itself is simple, cheap and will take only about an hour of your time; using a pro may be quicker and less messy, but you are going to pay for it. Keep that hard earned money in your pocket and tackle this job yourself in the comfort of your own garage.

Materials Needed
- Flat head screwdriver
- Large reservoir funnel
- Plenty of shop rags
- Many catch cans to fill with old fluid
- Radiator flush and flush kit (optional)
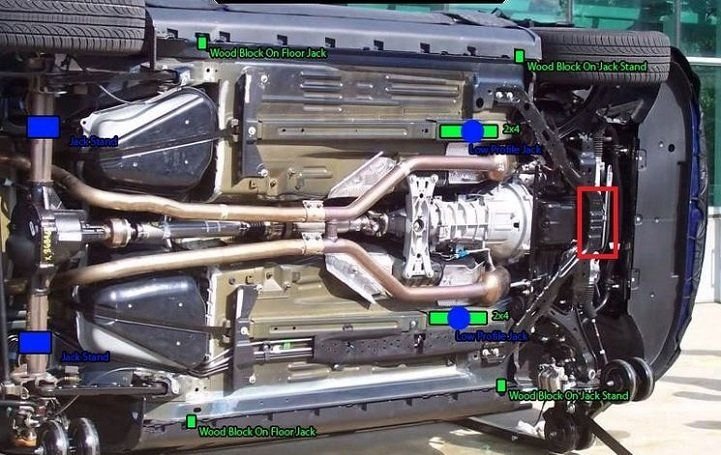
Step 1 – Jack up your car (optional)
If you need the space, jack up the front end of your car. Place on jack stands in the approved locations. This is optional, but it helps if you need the space to work under your car.
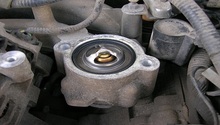
Step 2 – Remove the radiator cap
Make sure that your engine is cool before proceeding. Using a rag around the radiator cap, open it slowly and allow the pressure to come out slowly and under control. Remove the cap completely and set it aside.
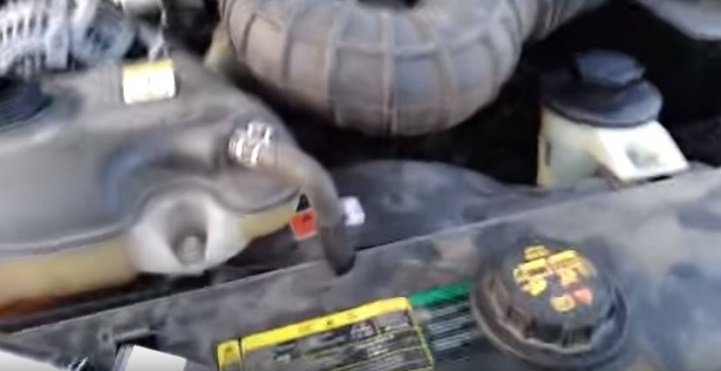
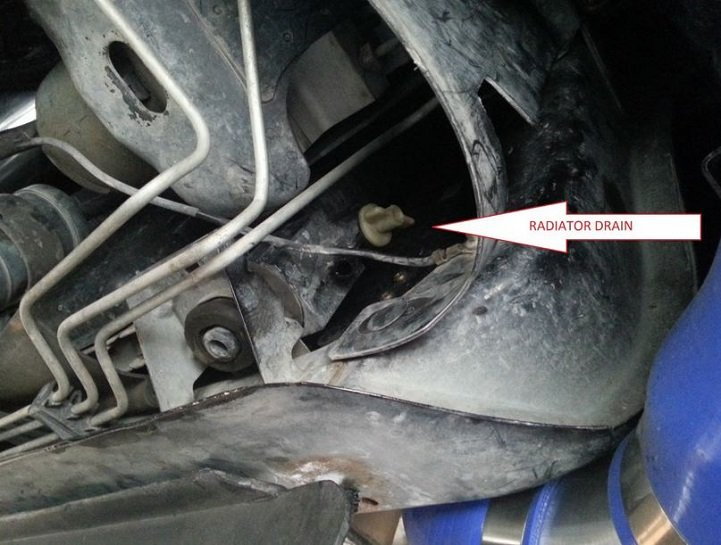
Step 3 – Remove the drain plug
Crawl under your car, get your catch basin ready and positioned under the radiator below the drain valve. The drain valve is on the bottom-left corner (passenger's side) of the radiator. It is white and may have wings to simply remove with your fingers, or it may have a large slot for a flat head screwdriver. Remove the plug and make sure you catch as much of the old fluid as possible. Once the fluid is completely drained, replace the drain plug.
Warning
Make sure to catch as much of the fluid as possible and immediately wipe up any that spills. Radiator fluid is nasty stuff, as well as deadly toxic to pets and animals. Please do not let it run into your rain gutters, but dispose of it properly. Most oil change shops will take in your used fluids with at no cost to you.
Step 4 – Fill your radiator with radiator flush (optional)
The use of a commercial brand of radiator flush is optional. Follow the instructions on the bottle if you choose to use it. Fill the radiator up completely with water and the flush if you are using it, then start the car. Let it get up to operating range. Make sure that the upper radiator hose gets hot before shutting down the engine. Once it has warmed up sufficiently, shut it down.

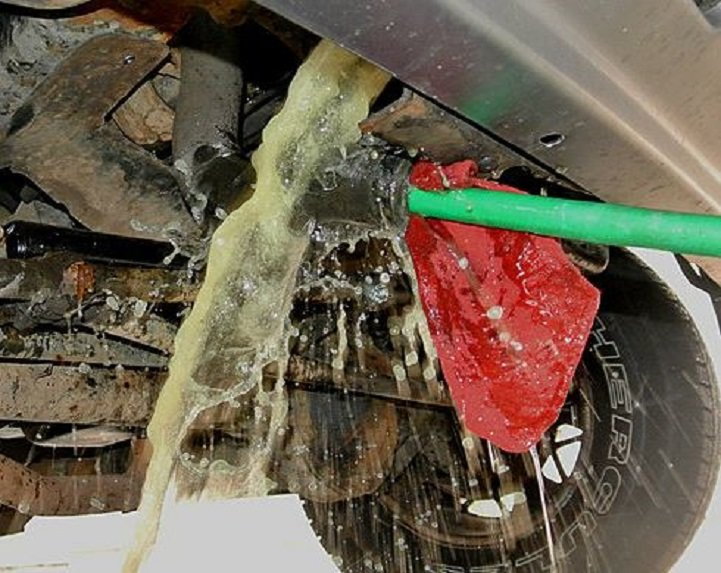
Step 5 – Flush radiator with garden hose
After the engine has sufficiently cooled, remove the radiator cap and pull the drain plug again. Let all that nasty stuff drain completely. Insert the garden hose into the radiator and use the highest amount of water pressure you can get out of the hose. Make sure you have a large enough reservoir under the drain plug to catch it all. Once the water starts flowing clear, shut it down. You may wish to run this flush through the lower radiator hose as well to really get it good and clean. Replace the drain plug.
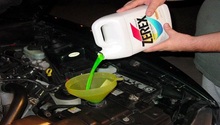
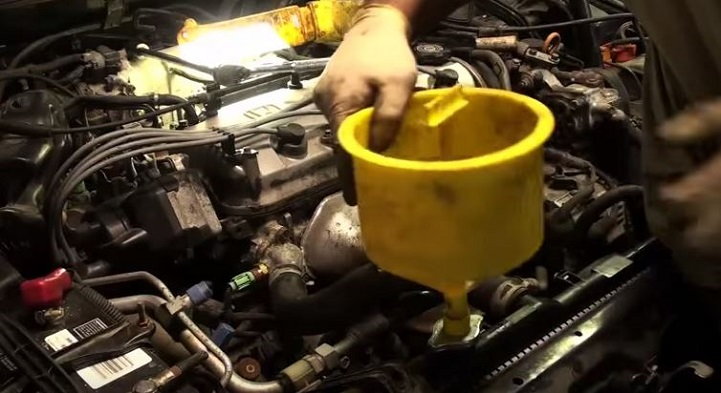
Step 6 – Fill the radiator with 50:50 mix
If you do not purchase the pre-mixed stuff, be sure to use distilled water in a 50:50 mix with the recommended anti-freeze fluid. Use a high capacity reservoir funnel to make the job of filling the radiator much less messy. You can use a universal type fluid if you prefer; however, if you do not, you have to make sure that you use the correct type and color. Once you have filled the radiator, fill the reservoir up to the indicated line.
Pro Tip
Do not mix anti-freeze types or colors. This will degrade the anti-corrosive properties of the fluids, as well as potentially change the viscosity, which will destroy your engine. Always use distilled water, as well.
Step 7 – Start your car
Leaving the radiator cap off, start your car and watch the fluid level. Let it run through, add more through the funnel if necessary. Watch the level in the reservoir, as well. Once it stabilizes, replace the radiator cap and continue to let the car get up to operating range. Keep an eye on the temperature gauge. Turn your heater on maximum and your vents on full blast. Make sure your temperature gauge remains stable in the center, and the vents are blowing out hot air. Check the upper radiator hose that it is hot. If any of that isn't right, open the bleeder valve for the coolant and burp any air out of the line. Re-test until it is working correctly. Double check the fluid level again and look for leaks.

Featured Video: How to Do Radiator Flush on 2010 Mustang
Related Discussions
- Drain and Flush Cooling System - MustangForums.com
- Radiator Flush - MustangForums.com
- Coolant Flush - MustangForums.com
- When Does Radiator Need to Be Flushed? - MustangForums.com