Ford Mustang V6 and GT 2005-2014: How to Install Struts and Shocks
Whether upgrading your quality of ride or repairing some handling that has deteriorated, here's how to swap out those dampers to get yourself back to wonderful feeling.
This article applies to the Ford Mustang V6 and GT (2005-2014).
Being that this platform is 10 years old already, it could be possible that you are suffering some deterioration in your ride quality. Or, maybe you just want to improve upon what is already there. Either way, the process of changing out the struts in the front and the shocks in the rear requires the same steps. It's not even that difficult and can be performed on a weekend afternoon if you choose to do so.
Upgrading struts and shocks is a very popular and cost effective way for Mustang owners to improve upon a very solid platform. One of the greatest features of the Mustang platform is the ability to modify and tweak it to the way you want it. The aftermarket support for these cars is endless, and their performance is potential greater than you would imagine.

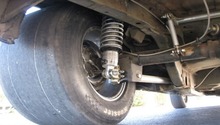
The front of these generations of Mustangs featured a MacPherson strut design in the front and shocks in the rear. Now, while the 2005 to 2014 Mustang is truly two different generations of the Mustang, the suspension design remained the same, so it's essentially the same procedure for both generations. If you are looking to upgrade the ride quality, there are many different options to choose from and your budget as well as intention will be the limiting factor.
Here are a few websites to check out when making your decision:
(Related Article: Shock Absorber Reviews - MustangForums.com)

Materials Needed
- Jack and jack stands
- Millimeter socket sizes 10mm-21mm
- Ratchet
- Millimeter wrenches sizes 10mm-18mm
- Spring compressor
Working with a strut assembly can be dangerous, due to the fact that the spring on the strut is under constant pressure. A spring compressor tool is required to remove the spring from the strut and then install it on the new strut. Make sure that when either buying, borrowing, or renting a spring compressor that you decide on one that is well made and can handle the forces that will be applied to it. Also, working with these components requires experience. So if you are new to working with these, then it would be a good idea to have someone available with the experience to show you what to look out for.
This how-to will be broken down into tow sections: one for the front strut and one for the rear shock.
Front Strut
Step 1 – Support car on jack stands and remove wheels
First thing you will want to do is raise the vehicle off the ground and support it securely on jack stands. You will want to support the vehicle by the subframe, due to the fact that you will need to be able to move the front and rear suspension freely.
Next, you will want to remove the wheels form the car and place them out of the way. Removing the wheels will make it so you can have access to the car's suspension.

Step 2 – Place jack under the lower control arm
Take your jack to place it under the lower control arm and raise it slightly to apply a little bit of pressure to the suspension.
Step 3 – Remove ABS harness, brake line, and stabilizer bar from the strut
The ABS front wheel sensor uses the strut to clip its wiring harness to. You will want to un-clip it where it is secured to the strut.
The front wheels' brake line also uses the strut to secure itself to. It should be held on by a bolt. Remove the bolt and free the brake line bracket from the strut.
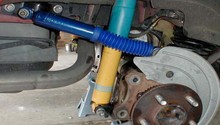
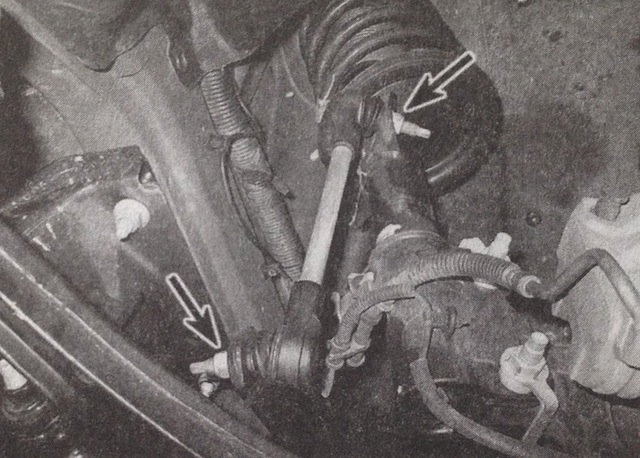
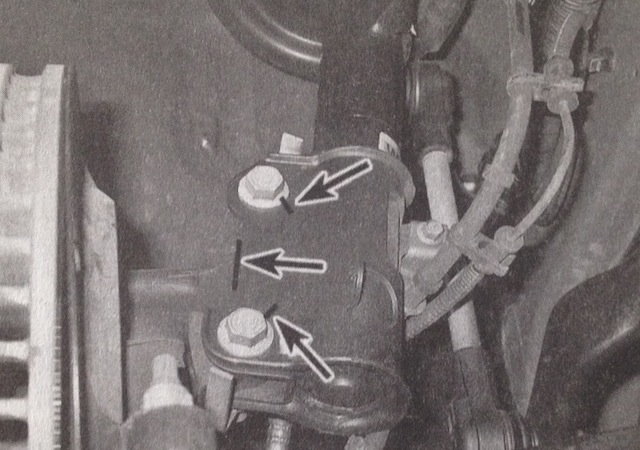
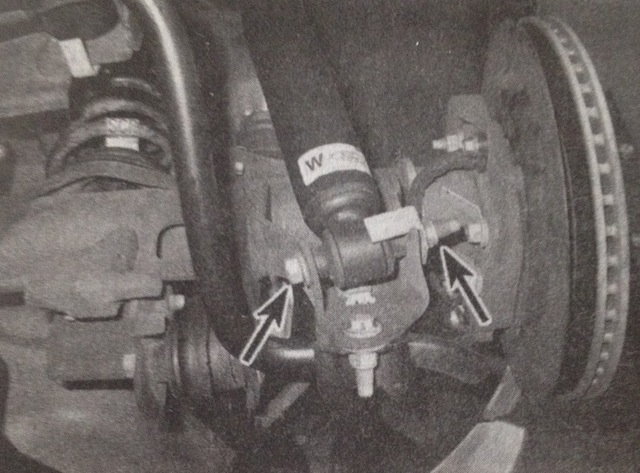
Next, go ahead and remove the stabilizer bar link from the strut. This will help to allow the front suspension to move freely, making it easier to remove the strut assembly from the vehicle. The stabilizer bar link is secured to the vehicle by two nuts, which is indicated in the image below. You can either remove one of the nuts on either end or both.
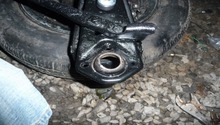
Step 4 – Remove strut-to-steering knuckle fasteners
The strut is held onto the steering knuckle by two bolts. Removing these bolts will free it from the steering knuckle.
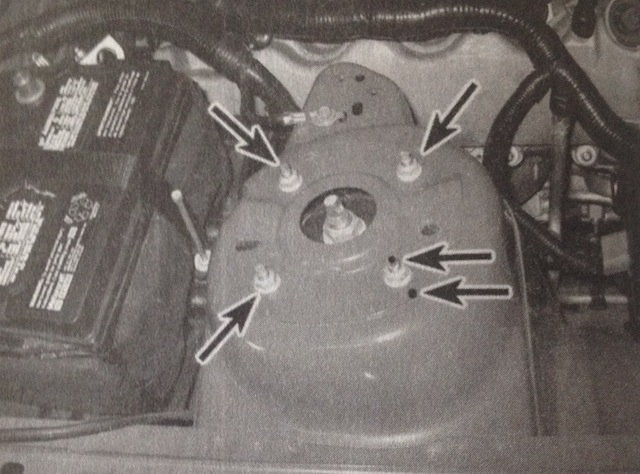
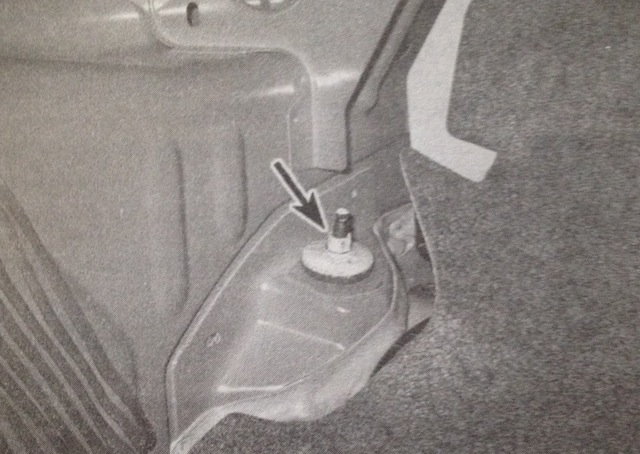
Step 5 – Remove upper strut mount-to-body fasteners
The strut mounts to the body by way of a strut mount. This strut mount secures to the body with four nuts that you can access under the hood of the car. Before removing the nuts and the strut mount, mark its relation to the body so that you can make sure to install it back in the car the way it came out. When you loosen these nuts completely and remove them, the strut assembly can then be removed from the vehicle. Be careful, as the steering knuckle will be free to fall outward. Make sure that it does not fall outward, so the brake line does not get damaged.
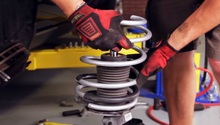
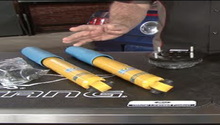
Step 6 – Disassemble and reassemble of strut assembly
Now that you have the strut assembly removed from the vehicle, you can begin to disassemble it. This is where you will need the spring compressor. It will help to mount it in something that won't move very easily, such as a vice. Also, each spring compressor will work a little bit differently. Make sure to read and understand fully the tool's instructions, so that you can safely and effectively use the tool.
- Install the spring compressor on the coil spring of the strut assembly and compress spring until all the pressure is relieved from the spring. You know it is relieved well enough when you can wiggle the spring.
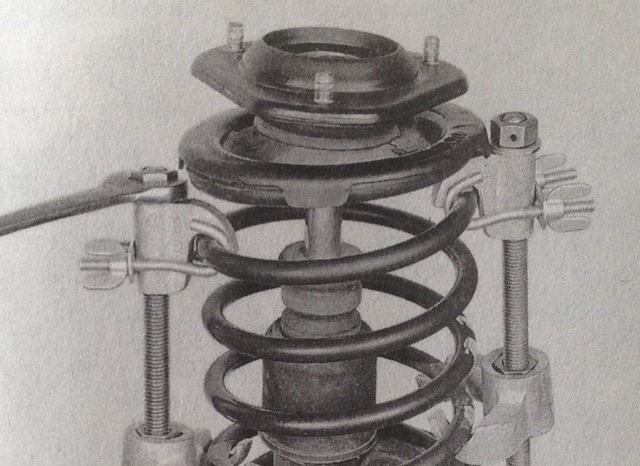
- Using two wrenches, remove the damper rod nut. The damper rod is located at the very top of the strut assembly. Use one wrench to hold the damper rod and the other wrench to loosen the nut.
- Remove the upper bearing assembly. The strut mount consists of a bearing surround by rubber. If the bearing does not move freely and the rubber looks to be separated or greatly deteriorated, you should replace the strut mount at this time.
- Remove the compressed spring from the strut assembly.

- There should be a rubber bumper and dust cover on the strut. If your new strut does not come with these, then you will need to reuse them.
- Place coil spring onto new strut, making sure that the end of the spring is positioned correctly onto the lower spring seat.
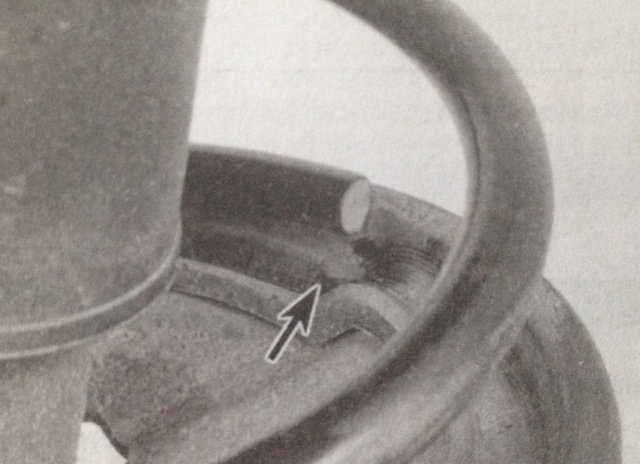
- Install the upper bearing assembly/strut mount. Make sure that the notch and arrow etched on the top of the upper bearing assembly points away from the vehicle, as it will be installed on the vehicle
- Install the damper rod nut and tighten.
Step 7 – Install strut assembly back onto vehicle
Now that you have installed the coil spring onto the new strut, you can place the strut assembly back onto the vehicle. The installation is the reverse as removal.
- Install the strut mount studs through the holes and tighten the four nuts.
- Slide the steering knuckle back into place on the strut and install the two bolts.
- Reattach the brake line bracket.
- Reattach the ABS wheel sensor wiring harness.
- Remove jack from under the lower control arm.
- Install the wheels.
Step 8 – Align vehicle
After installing new struts, it is necessary to take your vehicle to an alignment shop to have the alignment checked and adjusted. Obviously, if you're doing the rear shocks as well, have this done after everything is complete.
Rear Shocks
Step 1 – Place vehicle on jack stands
The vehicle will need to be raised and supported on jack stands in order to remove the rear shocks. Place the jack stands under the subframe so that you can move the rear axle assembly freely.
Step 2 – Place jack under axle tube
Take your jack and place it under the axle tube of the side of whatever shock you will be working on.
Step 3 – Remove shock upper mounting nut
The upper mounting nut of the shock is located inside the trunk. To remove the nut, you will need to hold the piston of the shock with a wrench to prevent it from moving while you loosen the nut. After the nut is loose, remove it and the washer as well as upper isolator.
Step 4 – Remove lower shock mounting fastener
One bolt holds the lower portion of the shock to the axle assembly. Removing the bolt will allow you to remove the old shock from the vehicle. If you need to, use your jack to move the axle assembly up or down to help free the shock.
Step 5 – Install new shock
Installing the new shock is the reverse as removal. Make sure that when putting the new shock in place that you install a new rubber isolator and washer to both sides of the new shock. Then install the piston rod through the hole in the body.
- Install lower shock mount fastener.
- Install nut on piston rod of shock.
- Lower vehicle back onto the ground.
After completing this how-to, call your local tire and alignment shop to get your car in for an alignment, ASAP. Whenever you disconnect the shocks and replace them, the suspension tends to wander out of alignment. Failure to have the car realigned in a reasonable amount of time will lead to poor tire wear, instability, and tracking and tramlining issues.
Featured Video: Mustang Strut and Shock Installation
Related Discussions
- Remove Rear Shock Top Bolt - MustangForums.com
- Rear Shock Install - MustangForums.com
- Installing Suspension Advice - MustangForums.com