Ford Mustang GT 2005-2014: How to Replace Thermostat
Overheating is no good, and a faulty thermostat is likely your problem. Learn how to replace it inside.
This article applies to the Mustang GT (2005-2014).
A broken thermostat can lead to severe engine damage or poor performance. If the thermostat is stuck open, it'll allow the coolant to constantly circulate through the radiator, which means the engine will take a lot longer to fully warm up and the radiator fan will always be running. If the thermostat is stuck closed, the coolant will never circulate to the radiator, which will allow the engine to overheat very quickly. In addition, these cars came from the factory with a thermostat housing made out of plastic. While this helps to save on costs, these are prone to cracking and causing massive coolant leaks.

Materials Needed
- Socket set
- Channel locks
- Flat head screwdriver
- Drain pan
- New coolant
- Drive-on car ramps
Step 1 – Drain the coolant
This step is optional, but I recommend draining the coolant to keep the mess minimal. When you disconnect the thermostat, you'll be making a break in the coolant flow pattern so any coolant above that point will want to come out and go all over the engine bay. While this isn't a huge deal, it'll cause some smoke to come from the engine until it all burns off. If you decide to skip the draining portion, make sure you at least place a drain pan and some old shop rags down below the thermostat to catch any fluid that comes out. Anti-freeze is very poisonous and has a sweet scent that attracts both domestic and wild animals, so you want to leave as little on the ground as possible.
Once you drain the coolant, you won't be able to move the car around. So make sure you park it in a spot that it can sit in while you do the work, as well as a spot that gives you access to get underneath. Since majority of people don't have a car lift in their garage, I suggest pulling it up on a set of drive-on car ramps.
- Remove the radiator reservoir cap.

- Working underneath, remove the three bolts holding the radiator shroud.
- With the shroud out of the way, remove all the bolts that hold the lower fascia in place.

- Position your drain pan underneath the coolant drain spout.
- Slowly loosen the petcock underneath until coolant begins to flow out the spout. You have two options here: you can either leave it so fluid is only coming out the spot, or completely take it off to have the fluid rush out quickly; however, it will get all over your hands doing this.

- Once the fluid has finished draining, tighten the petcock again.
Step 2 – Move the air intake
You'll need to move the air intake out of the way to be able to gain proper access to the thermostat.
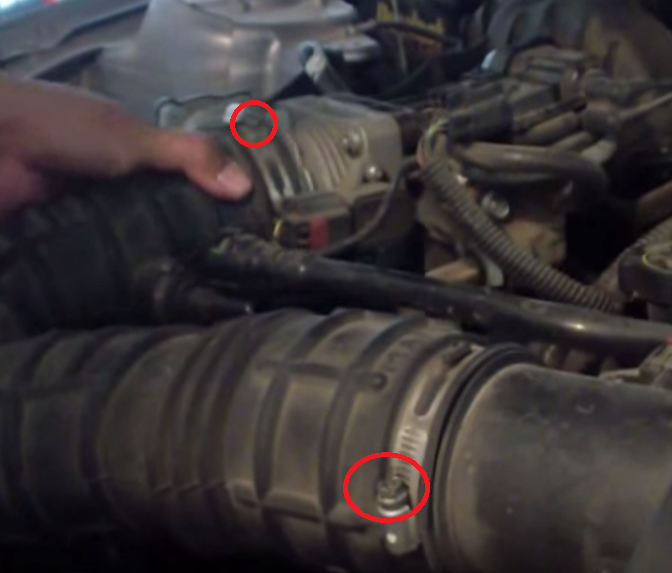
- Disconnect the mass air flow sensor electrical connection from the intake tube and push off to the side.
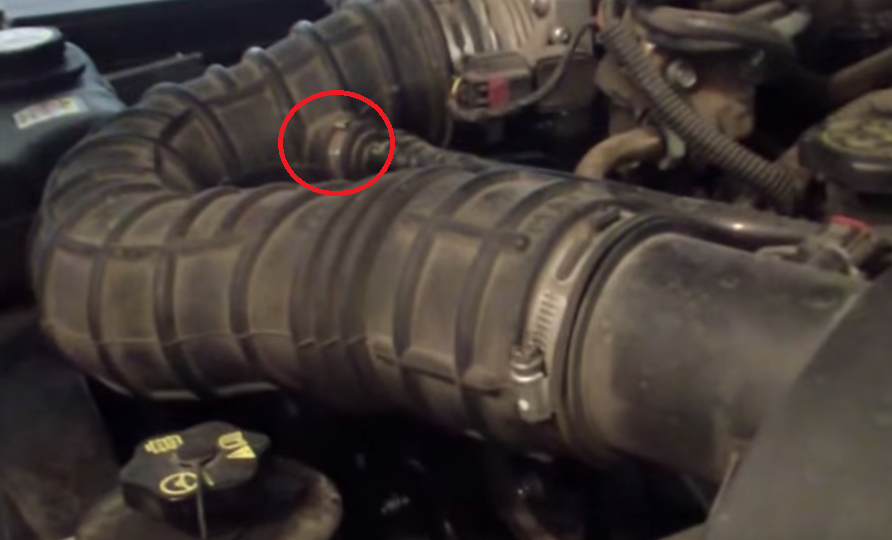
- Loosen the band clamp using a flat head screwdriver on both ends of the air intake tube.
- Slide the intake tube back off of the engine block intake connection.
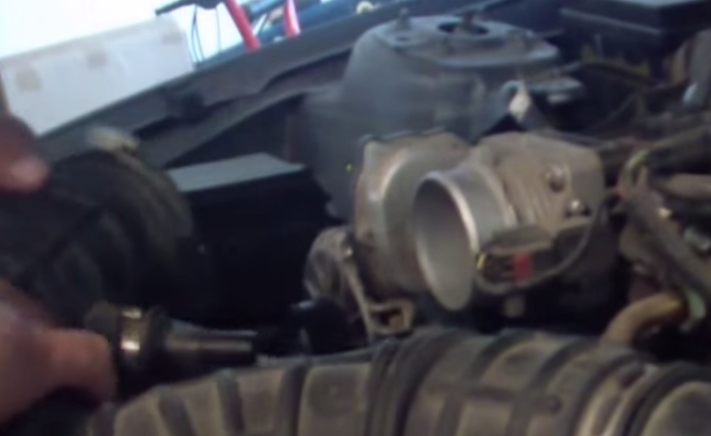
- You can either remove the intake tube from the air box end as well, or just rotate it around to keep it out of the way.
- Remove the four bolts that hold the intake butterfly valve in place and set off to the side.

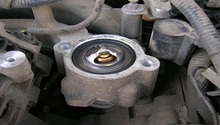
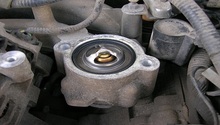
Step 3 – Remove thermostat
The steps below will be specific to removing the thermostat only.
- Using your socket wrench, remove the three bolts that hold the upper section of the thermostat housing to the lower section. You may need to use your flat head to pry them gently apart.

- Using a flat head screwdriver, pry out the thermostat. Be sure to inspect it to make sure the O-ring came out with it; if not, you'll need to dig out the old O-ring from the lower section of the housing.

- If you are removing the entire housing, the steps above are optional but will make gaining access to the bolts in the rear a lot easier.
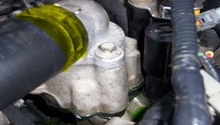
- Using a set of channel locks, squeeze together the band clamp on all radiator hoses coming from the thermostat housing and then slide the hose off.

- Disconnect the thermostat electrical connection.
- Remove the two bolts located in the back section of the thermostat housing, and then remove the housing.

Step 4 – Install new thermostat
- Install the new thermostat into the housing, making sure it is oriented in the same direction as the old one and it has the O-ring on the bottom.
- Reconnect all radiator hoses and the thermostat sensor electrical connection if you removed them.
- Re-install the three bolts that hold the upper thermostat housing section to the lower.
- Re-install the four bolts that hold the intake valve to the engine block.
- Re-install the intake tube and tighten both band clamps.
- Reconnect the mass air flow sensor.
- Re-install the lower fascia pieces if you removed them to drain the radiator.
- Refill and bleed the coolant.

Featured Video: '06 Ford Mustang Thermostat Replacement
Related Discussions
- Thermostat Installation - MustangForums.com
- Cobra Running Hot - MustangForums.com