Ford Mustang V6 and Mustang GT 1994-2004: How to Replace Tail Lights
A burnt out tail light can present a hazardous problem. It can also present a hefty ticket. Here's how to replace the tail light yourself on the Ford Mustang GT.
By Bassem Girgis - October 8, 2015
Contributors: 1AAuto.com
This article applies to the Ford Mustang V6 and Mustang GT (1994-2004).
The Ford Mustang and the Mustang GT are attractive, loud cars, but that's not enough to rely on at night. In order to get to the tail light bulb, you have to remove the tail light assembly. So whether you want to replace the bulb, or if you want to replace the assembly, the process is the same. Read on to learn how you can do this procedure on your own.
Materials Needed
Flat head screwdriver
11mm wrench
New bulb or assembly
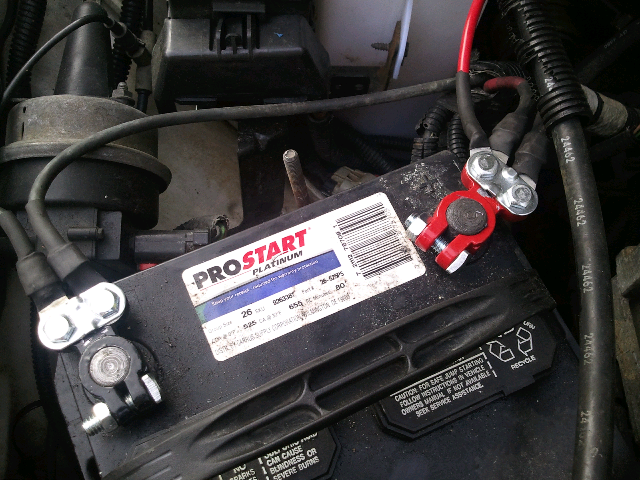
Step 1 – Disconnect your battery
Even though this is not completely necessary, safety should always come first. Open your hood and remove the negative (black) battery cable.
Figure 1. Disconnect the negative (black) terminal.
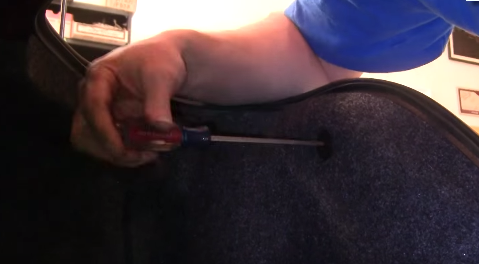
Step 2 – Remove trunk liner
Open the trunk of your mustang, and remove the retainers holding the liner near the tail light you will be replacing. Use your flat head screwdriver and turn it counterclockwise until it comes off. Then fold the liner and the panel inside of it away from the tail light.
Figure 2. Remove the retainer.
Figure 3. Turn your flat head counterclockwise.
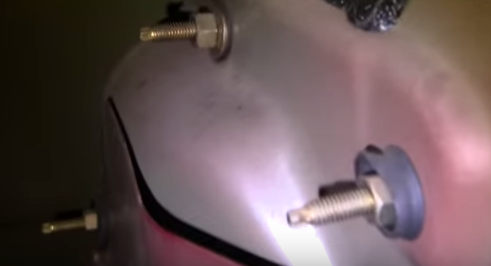
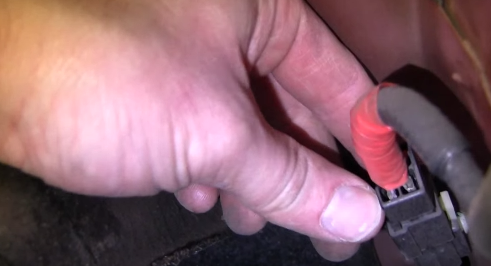
Step 3 – Remove tail light assembly
Disconnect the connector on the inside by the assembly. Then use your 11mm wrench to remove the four bolts holding the tail light assembly in place. When removed, pull the tail light assembly out gently.
Figure 4. Remove four bolts total.
Figure 5. Disconnect the wiring connector.
Step 4 – Replace the bulb
To remove the bulb, turn it counterclockwise and replace with a new one. If you want to install a new assembly, simply connect all the bulbs to the new assembly the same way it was connected to the old one by turning it clockwise and locking it into place.
Figure 6. Replace the faulty bulb.Featured Video: How to Replace Tail Light Bulb
How to Replace Headlights and Fog Lights
Got a bulb out?
This article applies to the Ford Mustang V6 and GT (2005-2014).
All vehicles come with headlights and tail lights. Most vehicles also come with "fog ...
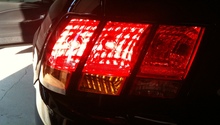
How to Replace Tail Lights
happywrenching
Broken tail light on your Mustang? Swap it out, just like this...
This article applies to the Ford Mustang V6 and Mustang GT (2005-2014).
So you return to your Mutang in ...
How to Install Rearview Backup Camera
Alex Jeanson
Your Ford Mustang isn't installed with a rearview camera? No problem, here's how to install one yourself.
This article applies to the Ford Mustang and Ford Mustang ...
How to Replace Headlights and Fog Lights
Brighten up your path.
This article applies to the Ford Mustang V6 and Mustang GT (1994-2004).
At some point of your Ford Mustang's life, you will have to replace a bulb; ...
How to Slow Down Sequential Tail Light Rate
WebElectric, American Muscle
Are the lights in your sequential tail light kit going to quick for your taste? Click here to slow them down.
This article applies to the Ford ...
How to Swap Out Map Lights for LEDs
Modify the interior of your 2005 to 2014 Ford Mustang V6 or GT with high performance LED bulbs.
This article applies to the Ford Mustang V6 or Ford Mustang GT (2005-2014).
While ...