Ford Mustang V6 2005-2014: How to Replace Brake Pads, Calipers, and Rotors
By replacing your brake's components, you ensure that your Ford Mustang will stop quick and safe. Read on to learn how to do it.
This article applies to the Ford Mustang V6 (2005-2014).
The Ford Mustang V6 is an extremely powerful car. With a strong, heavy car like that, strong brakes are needed. The brake pads and rotors work the hardest, as they clamp together to get your Mustang to stop from whatever speed your driving and to a complete stop. So you can only imagine how important it is to replace them religiously. Usually, the brake rotors need replacement when you let your brake pads go for too long without replacement. As for the brake calipers, some people drive their whole lives without needing to replace them. However, if your calipers are stuck, we will show you how to replace them, as well. The procedure will go over replacing the brake pads, then rotors, and finally the brake calipers in the Ford Mustang.


Materials Needed
- Jack and jack stands
- Tire iron
- Flat head screwdriver
- C-clamp
- Clear hose
- Bottle
- 3/8 wrench
- 12mm socket
- Rubber mallet
- Brake fluid
- New brake pads
- New brake rotor
- New brake caliper
Step 1 – Raise the car
Loosen the lug nuts on the wheel you will be working on, then raise the car using your jack. Secure the car with your jack stands and remove the lug nuts using your tire iron, then remove the wheels.
Step 2 – Replace brake pads
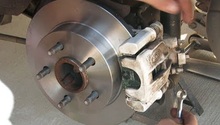
Remove the two 12mm bolts holding the brake caliper in place. One is located on the top of the brake caliper and the second one is located on the bottom.
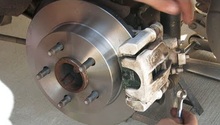
Pull the brake caliper up and secure it somewhere safe. Do not let it hang from the brake line.
The brake pads will stay on the rotor, so pull them off, and install the new ones.
Use your C-clamp to compress the brake caliper's piston, so it can fit on the brake pads again. When compressed all the way in, install the brake caliper on top of the pads and tighten the two 12mm bolts again. If you are replacing the rotors, leave the pads off for now, and if you are replacing the caliper, then you don't need to compress the old one.
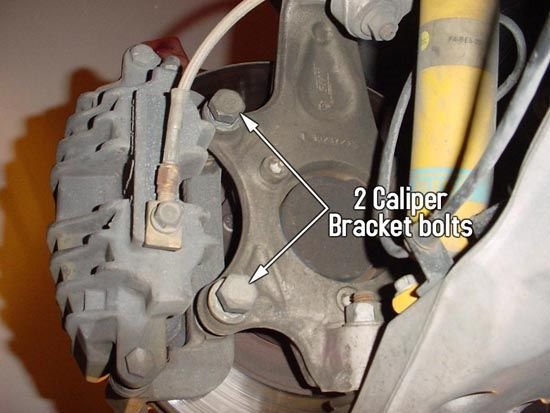
Figure 3. Inside view of caliper bolts. 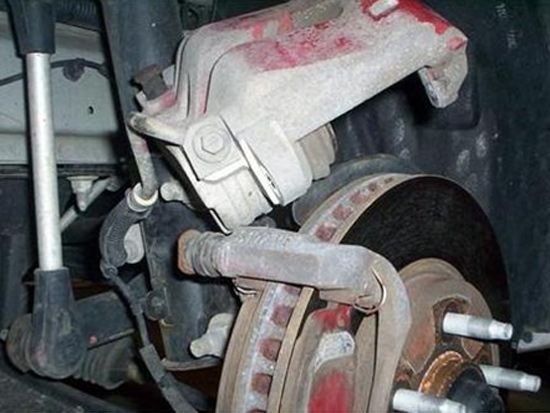
Figure 4. Pull caliper off. 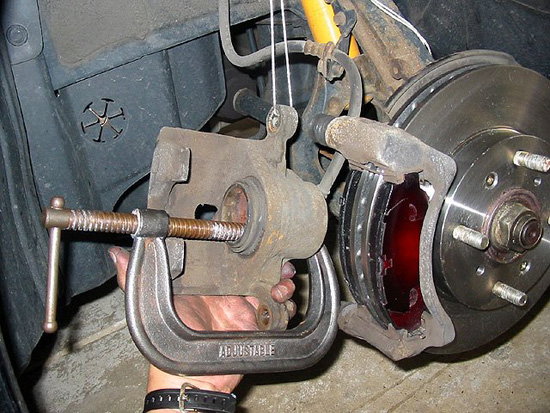
Figure 5. Compress caliper's piston.
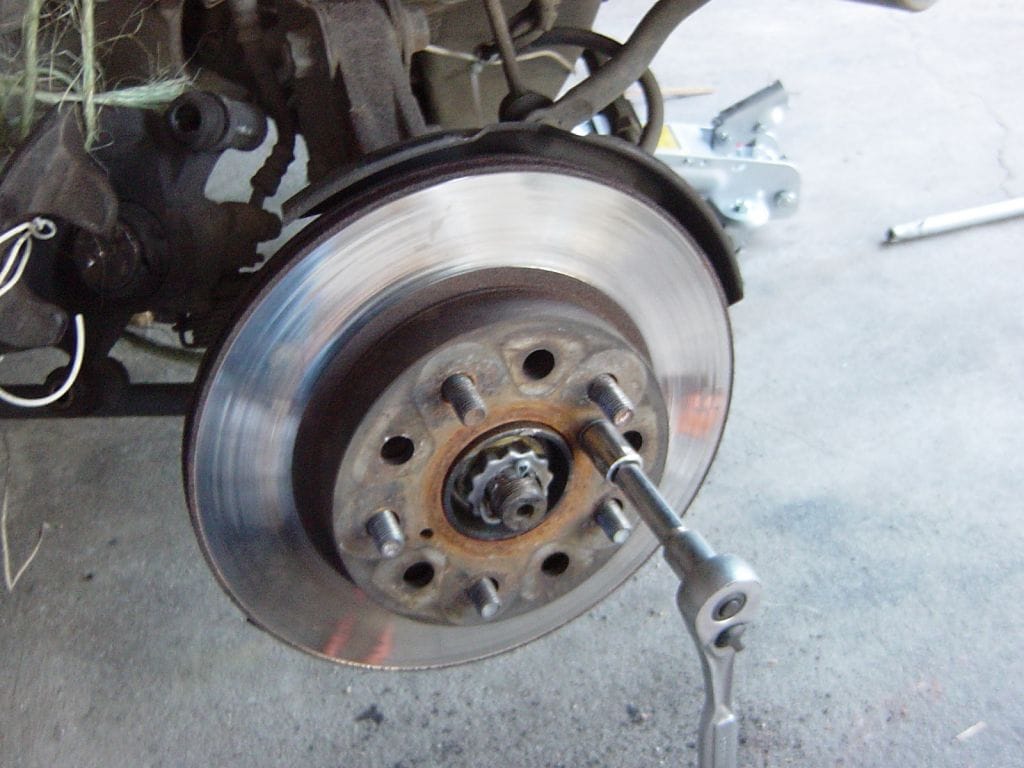
Step 3 – Replace brake rotor
With the caliper and pads off, as well as out of the way, pull the rotor out. Even though there are no bolts or screws holding it in place, most of the time it'll be stuck in place tightly. You can use a rubber mallet to tap it, and as soon as it gets loose, pull it out. You can screw two 8mm bolts in its holes, tighten them until it comes loose, and then pull it out.
Step 4 – Replace caliper
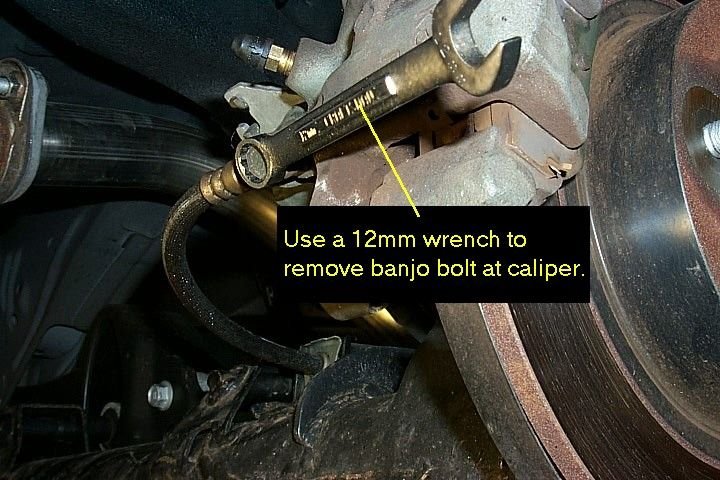
To replace the caliper, remove the bolt connecting the brake line to the caliper and install it into the new caliper immediately. Be sure to have a rag to wipe any brake fluid, as it's corrosive to paint.
Tighten the brake line bolt, then place the new caliper onto the hub the same way the old one was, and tighten the two 12mm bolts on the top as well as bottom of the caliper.
Step 5 – Bleed brakes
The brake system is a pressurized system, which means any air the goes into it will affect its feel and performance tremendously.
You need to bleed each brake caliper that you worked on. If you worked on all of them, the sequence to bleeding your brakes is as follows:
Start with the passenger's side rear caliper, then move to the passenger's side front caliper, driver's side rear caliper, and finally end with the driver's side front caliper.
Locate the bleeder valve on the back of each brake caliper. Put the clear hose on the bleeder valve, and connect the other end of the hose to a bottle. Ask a friend to press the brake pedal, then loosen the bleeder valve. Brake fluid will start draining, so keep an eye on it, and as soon as you stop seeing bubbles, tighten the bleeder valve. This means there is no more air in the system.
Be sure to refill the brake fluid reservoir under the hood between each wheel; if the level gets too low, you will need to re-do the whole process.

Figure 8. Bleeder valve. 
Figure 9. Bleed each caliper.
Related Discussions
- Replacing Pads - MustangForums.com
- Replacing Pads and Rotors - MustangForums.com
- Caliper Removal - MustangForums.com