Ford Mustang GT 1996-2004: How to Replace Thermostat
Have you noticed your Mustang becomes excessively hot in just a little bit of time? In all likelihood, the problem is the vehicle’s thermostat. The good news is it’s easy to locate and replace, so you can fix it yourself.
This article applies to the Ford Mustang GT (1996-2004).
The thermostat in your Mustang is an important, albeit oft-forgotten, component in your car. If your car begins to overheat, or otherwise has a problem warming up, chances are it needs to be replaced. The good news is that this is a fairly simple, totally inexpensive thing you can do yourself, and it can go a long way to ensuring your car performs optimally.
To learn how to replace the thermostat yourself, read on.


Materials Needed
- Socket set
- Screwdriver
- New thermostat
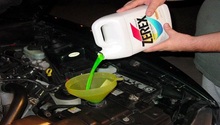
- Coolant
- Bucket
Step 1 – Let the car cool down
Coolant gets hot after being driven; it’s also very toxic. If you’ve taken the Mustang out for a spin recently, let it sit for a few hours to give the system a chance to cool. Failure to do so prior to performing this task could result in serious injury.

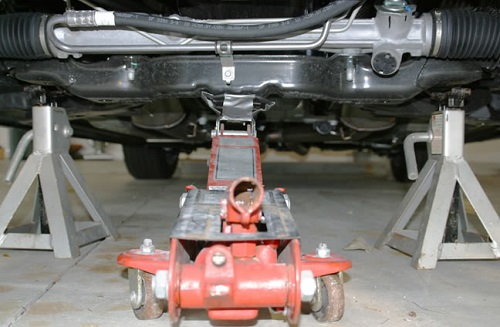
Step 2 – Drain the coolant system
Jack the car up on the front and open the radiator drain plug; allow the system to bleed into a bucket below. Let the entire system drain. If you're draining from the radiator, you can expect about one to one-and-a-half gallons to drain out, so give it a few minutes. The more coolant that you get out now, the less mess you will have to contend with later.
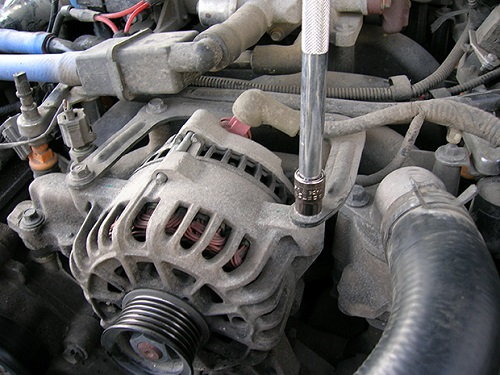
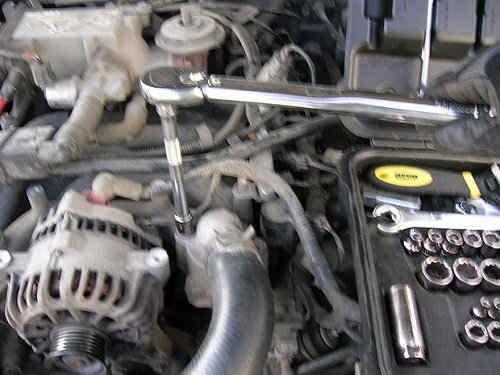
Step 3 – Undo bolts
The alternator is obscuring the thermostat. Remove the bolts securing it and swing it out of the way for full access. Using a 10mm socket, undo the alternator bracket bolts. Now remove the thermostat housing bolts (they’re 10mm, as well).
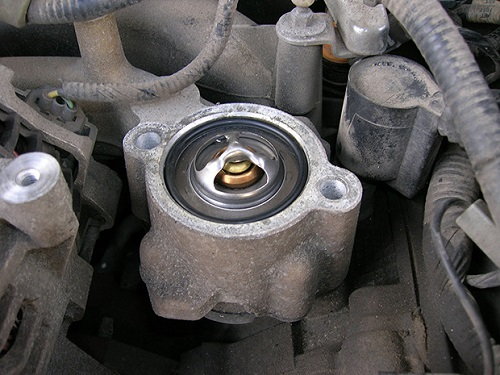
Step 4 – Pull out the old thermostat
Pull off the thermostat housing and hose. You’ll now see the thermostat—using a screwdriver, carefully pull it out. If you are uncomfortable using a screwdriver, vice grips work just as well.
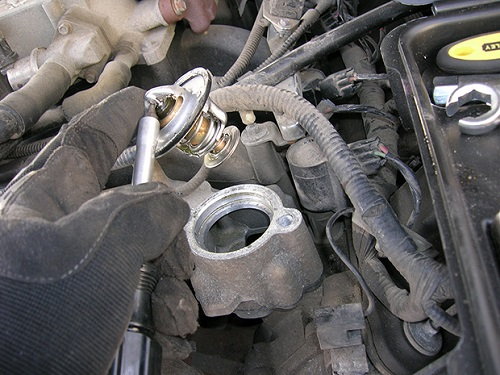
Step 5 – Replace with new thermostat
Insert the new thermostat and O-ring, and take a moment to ensure everything is properly in place. To do this, push down on the thermostat with your thumb and for the thermostat bottoming out in the housing—do know that it won’t stay in place because the spring below it will push it back up. Double check the O-ring is seated correctly and properly sealed.
Step 6 – Replace bolts
Using a torque wrench set to 18 ft/lbs (25 Nm), replace housing bolts. Now reattach the alternator bracket. There aren’t any torque specs on this, so just carefully tighten until they’re snug.
Step 7 – Refill coolant
Use a pre-mix, or concentrated diluted with distilled water, to fill the radiator overflow until the level reads right in the middle. With this done, we need to bleed the system so that no air bubbles are present. To do so, leave the overflow cap off and start the car. Let it idle for approximately ten minutes. The goal is to get the engine up to operating temp and have the new, functional thermostat flip over and kick the fans on. Once the fans are triggered, it means the system is working as intended. Let it idle for another few minutes, tighten the overflow cap back on and go for a test drive to make sure that the overheating condition is fixed.
Featured Video: 1996-2004 Mustang Thermostat Replacement
Related Discussions, Site and Video
- Thermostat Installation - MustangForums.com
- 96 Cobra Running Hot - MustangForums.com
- 1999-2004 Ford Mustang GT Thermostat Install - MustangEvolution.com
- 4.6 Thermostat Replacement - YouTube.com