
HOW TO: VHT Headlights and Tail lights
 12-21-2008, 11:21 AM
#1
3rd Gear Member
Thread Starter
Join Date: Jan 2008
Location: NC
Posts: 903
Moderators: might want to sticky this, i know allot of people have asked for it and here it is..
First, There are two things being done in this how to. Headlights mainly, and tails. Do know, that the SAME exact process is involved in both. So every step done on the headlights is done on the tails..
I will post mainly the headlights since I have more pics of them done.
Items needed for this job
-1000 grit sandpaper
-2000 grit sandpaper
-medium and fine scratch rubbing compund
-alcohol or acetone
-lint free rags / microfiber rags
-random spin orbital buffer ( I purchased mine from autozone for $20. the 6 inch one ) although a quality buffer will do the job faster and easier. Check out a porter cable orbital. Might want to get some extra bonnets for that $20 buffer.. they come in handy, if you choose that buffer.
- VHT translucent paint.. bought it from here http://www.trucknvans.com/SearchResults.asp?Search=VHT though you can buy it from advance auto parts. They carry it now. Some other auto stores my carry this as well.
- Clear coat . I use ONLY Sherwin Williams " UltraBase 7 KutIn spray can " Although you can use any kind.
- Bowl of water
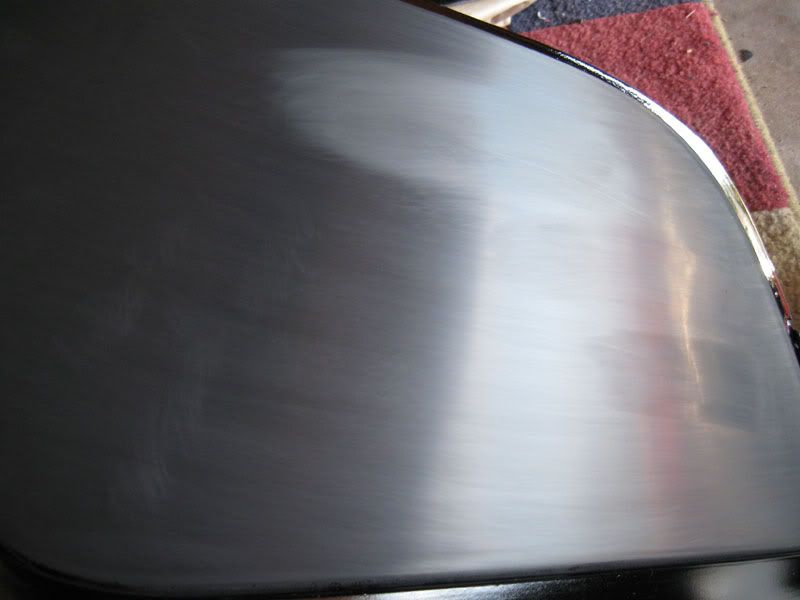
Start by dry sanding the lens
Only difference between headlights /tails is you ONLY use 2000 grit on the headlight.
Tails you use 1000 grit for the first step
Once done sanding. It should look like this
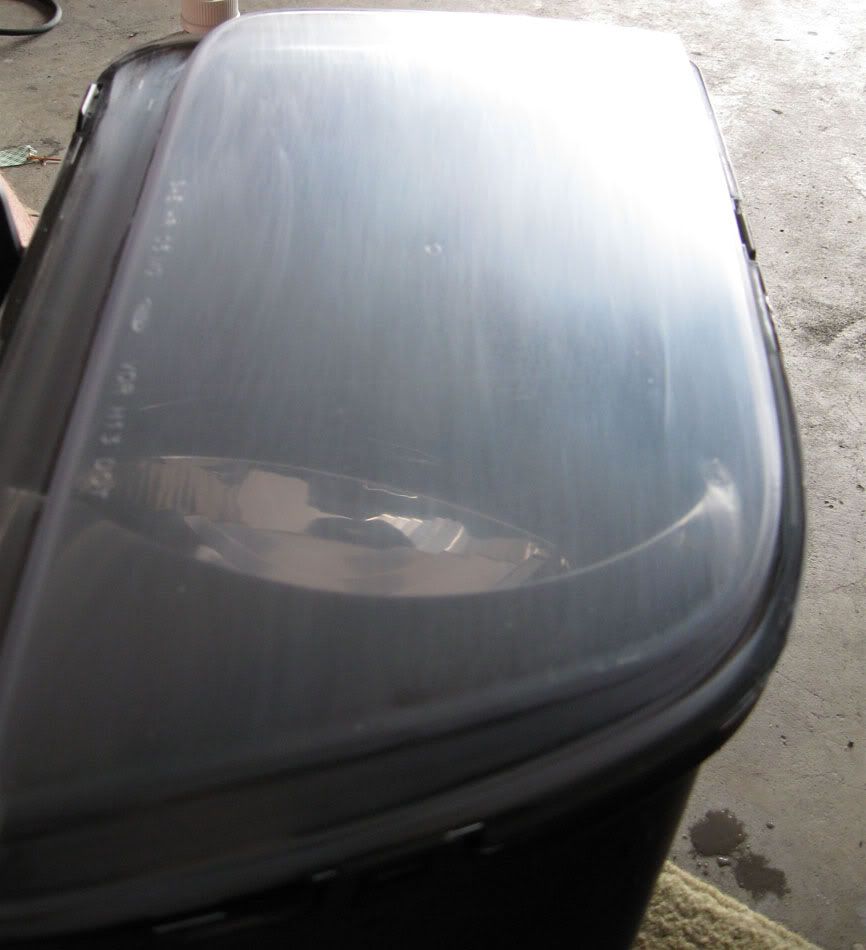
Clean it with a lint free rag and either alcohol or acetone. This will ensure no oil, wax, or other impurities will be on the lens.
When you spray the lenses, ALWAYS start with the edges. The edges need more attention so that light won't shrow through or have imperfections.
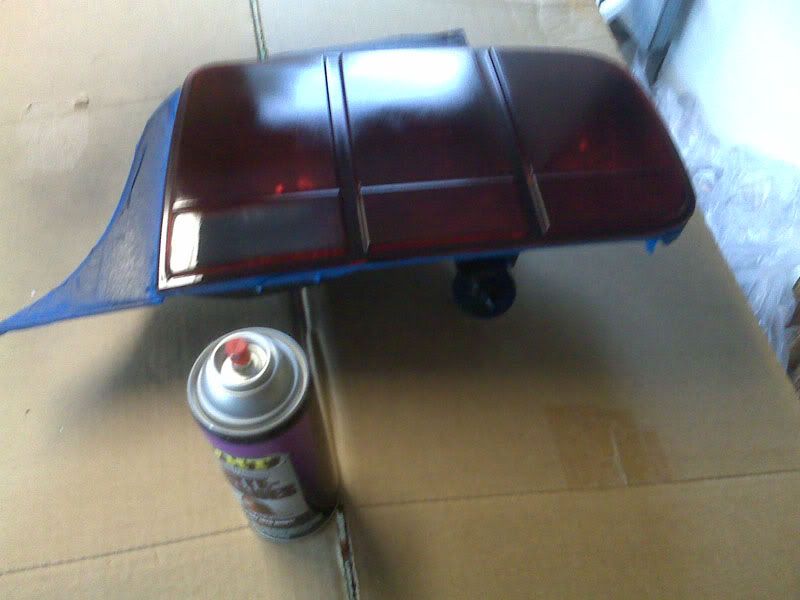
Spray a THIN coat of VHT. When I say thin, I mean thin. This coat will act as a bonder..
Should look like this

Wait about 10-20 minutes in between each coat ..
After the first thin coat you can make them a bit thicker. not too thick though.. And always spray both lenses evenly... Don't want one darker than the other
After about 2 more coats. it should look like this
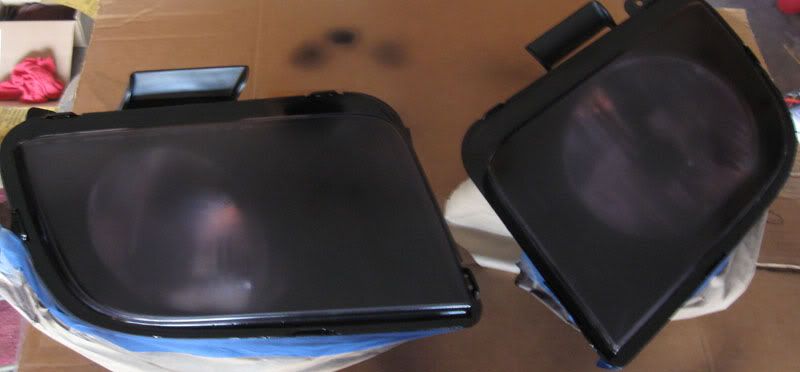
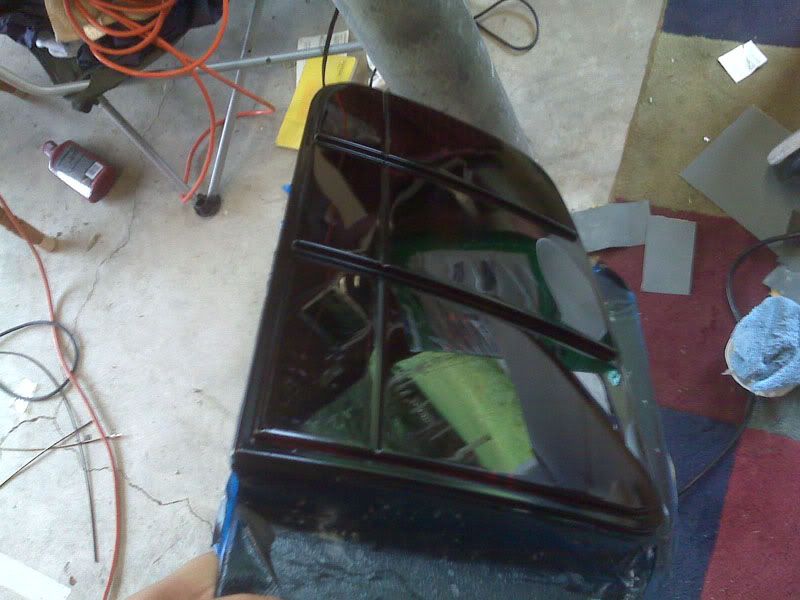
another coat will have them looking like this
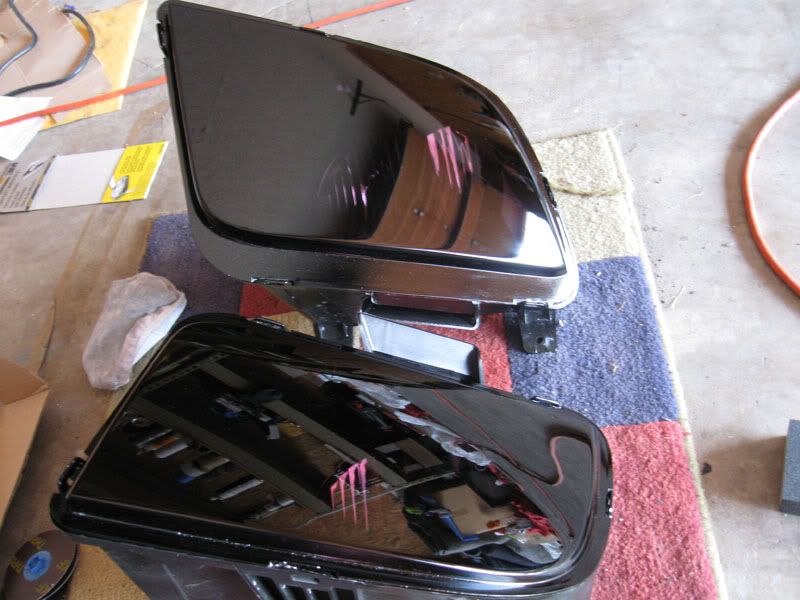
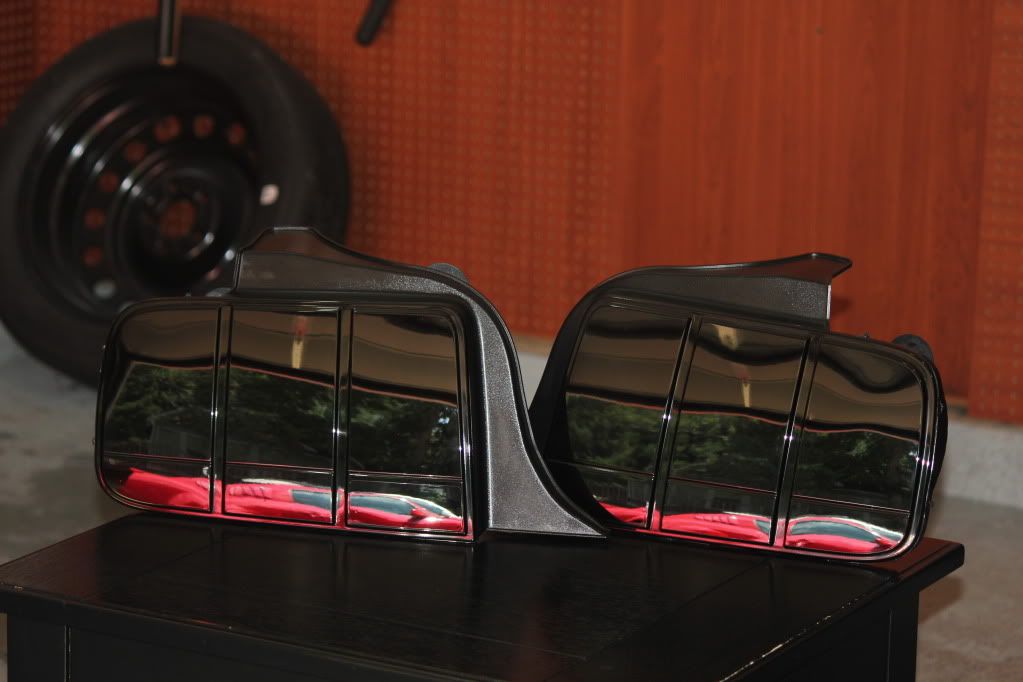
Finally after the 6th coat ( remember they are not heavy coats ) it will look like this
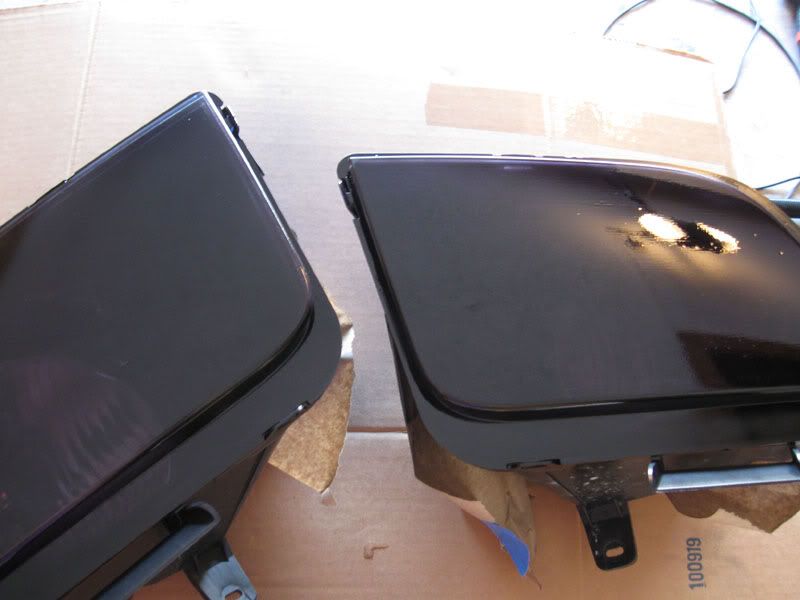
After the final coat is dried up, inspect it to make sure nothing got on the surface, such as dust, a gnat, fly or something of that sort. If that happened you can do a quick wetsand with 2000 grit to get the impurities off the lenses. And clean it with alcohol ( nothing stronger than 70% ).. Don't rub it too hard as alcohol will strip paint off.. so you might want to be careful with that. If you feel uncomfortable with that just use soap and water and wipe it clean..
Then comes the clear coat.
again, thin coat first as a bonder..
Wait about 15-20 minutes for that coat to dry.. then spray a medium wet coat..
when you spray clear, try to look at the lenses with light coming towards you not from behind you, so that you can see how even you apply the clear..
( when I talk about light, I mean face the garage door or whatever place you are in)
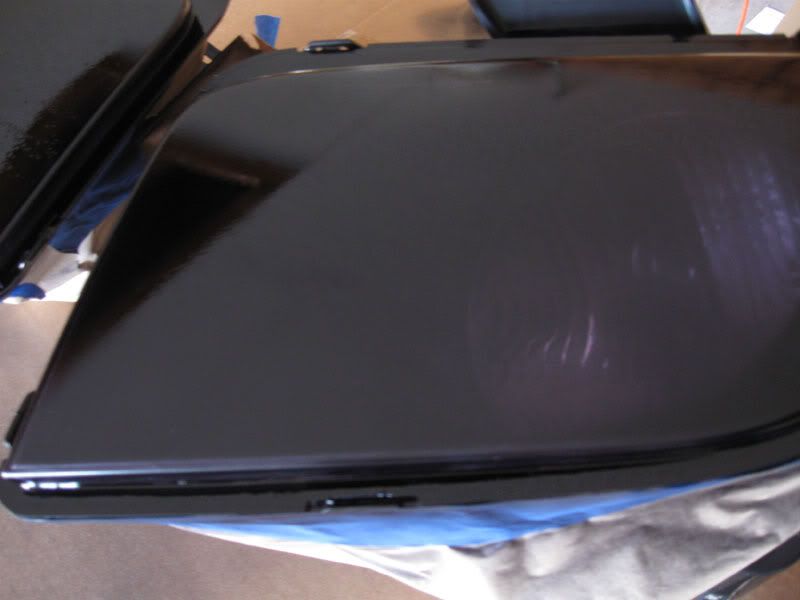
After about 20 minutes, apply the last coat. this one will be heavy..
Should look like this
Allow the clear to dry overnight..
One thing you will notice is that the clear at first might be a bit hazy. That happens when you apply too much. Dont' worry, it will clear up..
The whole cure time on the lenses would be aprox about 2 weeks, depending on temperature and if you park in the sun or in the garage.. ( this is cure time. Doesn't stop you from polishing once it's dry. )
So once you are ready to start making magic happen you need to grab you a bowl of water, some 2000 grit sand paper, some elbow grease and patience ..
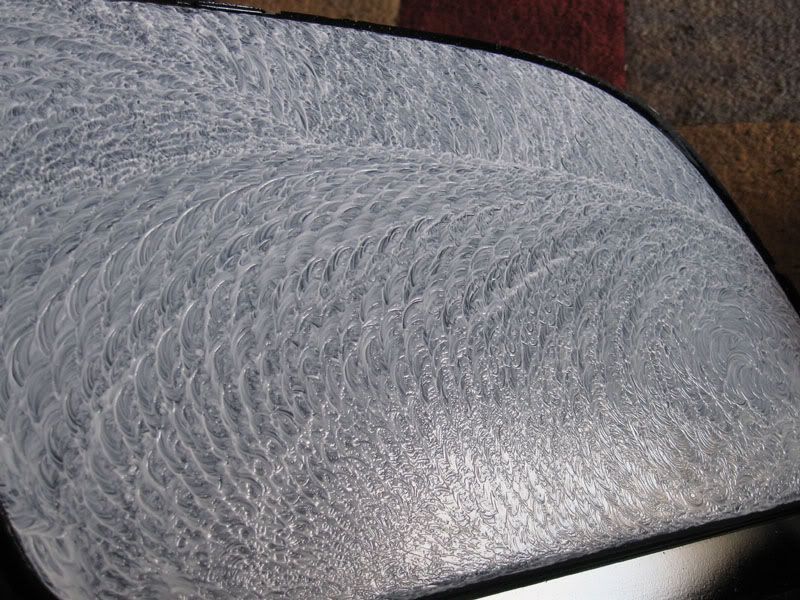
Start Wetsanding the lens in a side to side motion only. Don't do circles or any other pattern.
You want to make sure your lens does NOT look like this when you think you are finished
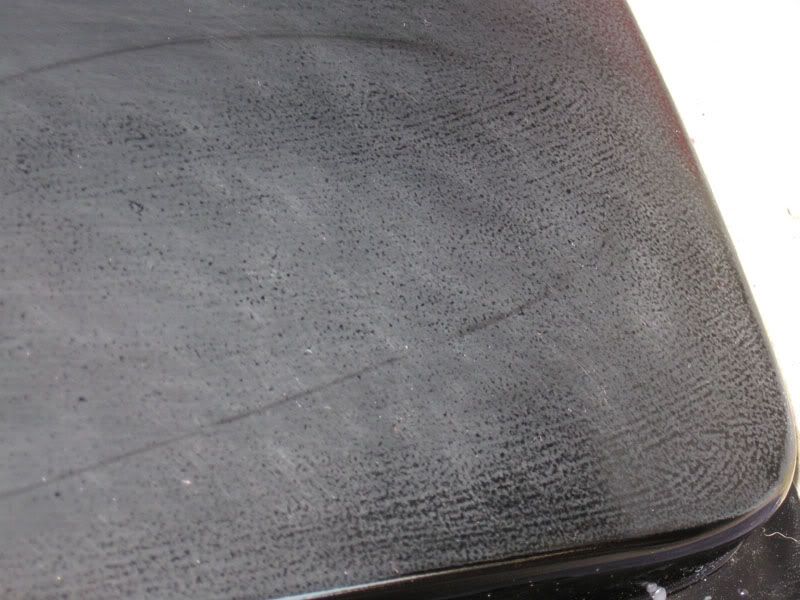
You need to sand those little shiny bubles off the lens.
Your end result WILL look like this
Now you are ready to buff.
Grab your orbital buffer, and the rubbing compund.. Again medium to fine scratch remover.
apply a generous ammount of compund to the lens and spread it around..
Buff it for a good ammount of time untill the compund is no longer white, but looks like a oily residue on the lens..
Then clean up the lens, and change the bonnet on the buffer. You want to repeat this last step again.. So twice per lens.. usually about 15 minutes each time.. so about an hour for both lenses toghether.
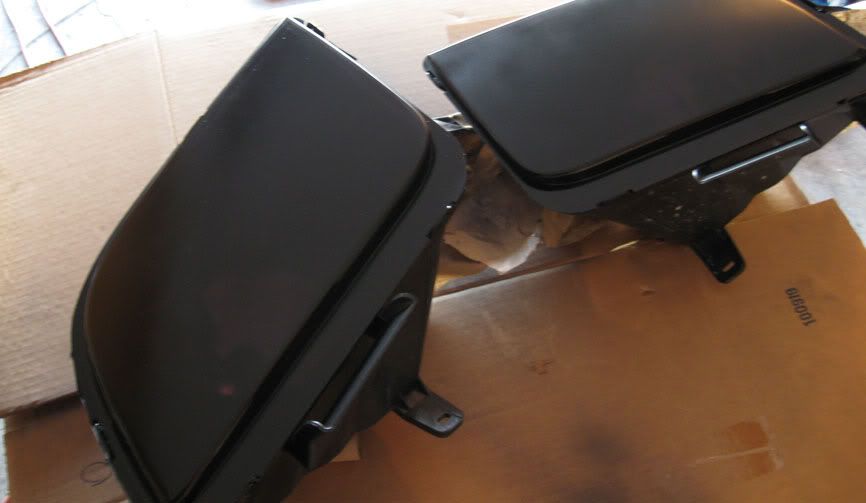
Once done, clean up the lens.. Change the bonnet and time to wax it ..
I use NXT 2.0 and I love it..
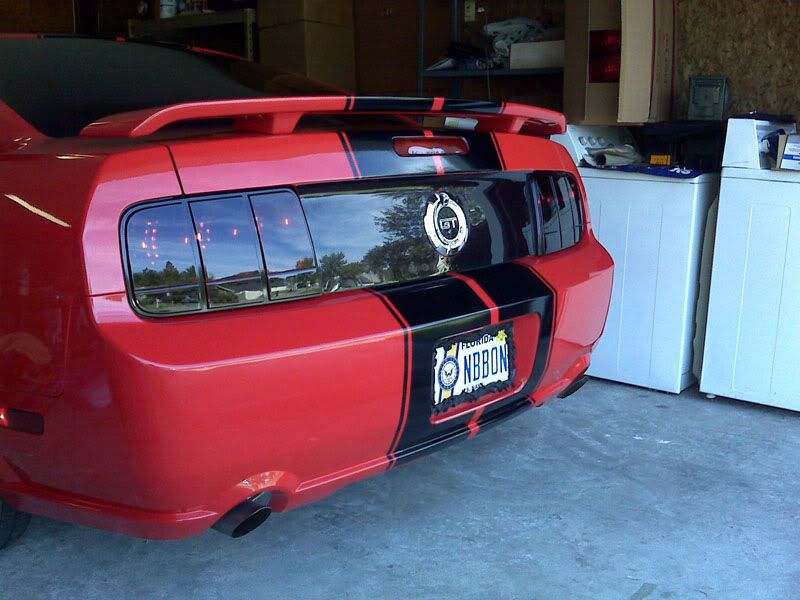
Give it a good wax and the end result will look like this

Hope this helps all you guys that want to do these mods your own selves.
One thing you need to remember though..
The headlights are for SHOW ONLY. Do not use them as daily drivers.. they will shine through purple and will NOT be legal in any stat that I know of.. The ones I did I did as a custom order for a club member that uses the car just for shows..
Have fun with this mod, and if there are any questions that I did not answer here, feel free to PM me.
First, There are two things being done in this how to. Headlights mainly, and tails. Do know, that the SAME exact process is involved in both. So every step done on the headlights is done on the tails..
I will post mainly the headlights since I have more pics of them done.
Items needed for this job
-1000 grit sandpaper
-2000 grit sandpaper
-medium and fine scratch rubbing compund
-alcohol or acetone
-lint free rags / microfiber rags
-random spin orbital buffer ( I purchased mine from autozone for $20. the 6 inch one ) although a quality buffer will do the job faster and easier. Check out a porter cable orbital. Might want to get some extra bonnets for that $20 buffer.. they come in handy, if you choose that buffer.
- VHT translucent paint.. bought it from here http://www.trucknvans.com/SearchResults.asp?Search=VHT though you can buy it from advance auto parts. They carry it now. Some other auto stores my carry this as well.
- Clear coat . I use ONLY Sherwin Williams " UltraBase 7 KutIn spray can " Although you can use any kind.
- Bowl of water
Start by dry sanding the lens
Only difference between headlights /tails is you ONLY use 2000 grit on the headlight.
Tails you use 1000 grit for the first step
Once done sanding. It should look like this
Clean it with a lint free rag and either alcohol or acetone. This will ensure no oil, wax, or other impurities will be on the lens.
When you spray the lenses, ALWAYS start with the edges. The edges need more attention so that light won't shrow through or have imperfections.
Spray a THIN coat of VHT. When I say thin, I mean thin. This coat will act as a bonder..
Should look like this
Wait about 10-20 minutes in between each coat ..
After the first thin coat you can make them a bit thicker. not too thick though.. And always spray both lenses evenly... Don't want one darker than the other
After about 2 more coats. it should look like this
another coat will have them looking like this
Finally after the 6th coat ( remember they are not heavy coats ) it will look like this
After the final coat is dried up, inspect it to make sure nothing got on the surface, such as dust, a gnat, fly
or something of that sort. If that happened you can do a quick wetsand with 2000 grit to get the impurities off the lenses. And clean it with alcohol ( nothing stronger than 70% ).. Don't rub it too hard as alcohol will strip paint off.. so you might want to be careful with that. If you feel uncomfortable with that just use soap and water and wipe it clean.. Then comes the clear coat.
again, thin coat first as a bonder..
Wait about 15-20 minutes for that coat to dry.. then spray a medium wet coat..
when you spray clear, try to look at the lenses with light coming towards you not from behind you, so that you can see how even you apply the clear..
( when I talk about light, I mean face the garage door or whatever place you are in
) After about 20 minutes, apply the last coat. this one will be heavy..
Should look like this
Allow the clear to dry overnight..
One thing you will notice is that the clear at first might be a bit hazy. That happens when you apply too much. Dont' worry, it will clear up..
The whole cure time on the lenses would be aprox about 2 weeks, depending on temperature and if you park in the sun or in the garage.. ( this is cure time. Doesn't stop you from polishing once it's dry. )
So once you are ready to start making magic happen you need to grab you a bowl of water, some 2000 grit sand paper, some elbow grease and patience ..
Start Wetsanding the lens in a side to side motion only. Don't do circles or any other pattern.
You want to make sure your lens does NOT look like this when you think you are finished
You need to sand those little shiny bubles off the lens.
Your end result WILL look like this
Now you are ready to buff.
Grab your orbital buffer, and the rubbing compund.. Again medium to fine scratch remover.
apply a generous ammount of compund to the lens and spread it around..
Buff it for a good ammount of time untill the compund is no longer white, but looks like a oily residue on the lens..
Then clean up the lens, and change the bonnet on the buffer. You want to repeat this last step again.. So twice per lens.. usually about 15 minutes each time.. so about an hour for both lenses toghether.
Once done, clean up the lens.. Change the bonnet and time to wax it ..
I use NXT 2.0 and I love it..
Give it a good wax and the end result will look like this
Hope this helps all you guys that want to do these mods your own selves.
One thing you need to remember though..
The headlights are for SHOW ONLY. Do not use them as daily drivers.. they will shine through purple and will NOT be legal in any stat that I know of.. The ones I did I did as a custom order for a club member that uses the car just for shows..
Have fun with this mod, and if there are any questions that I did not answer here, feel free to PM me.
Last edited by eddypython; 07-26-2011 at 10:38 PM.

 12-21-2008, 12:08 PM
#4
3rd Gear Member
Thread Starter
Join Date: Jan 2008
Location: NC
Posts: 903
Those are not GT500 lights and I did not darken mine. I use the car as a DD
It's a very simple process.. and if someone attempting this is a bit scared to do it practice makes better. look for a company eagleeyes that makes headlights and tails for our cars for about 25 $
I am thinking about doing some for other people but I won't be able to be bombarded with orders lol...
Joe if you find a second pair you want to do shoot me a PM and we'll see what we can do.

